Integrating a shop into your virtual tour is a powerful way to create an interactive and immersive shopping experience for your audience. With NestTrail, you can easily set up a shop using Snipcart integration or your existing WooCommerce site. This guide provides an in-depth explanation of the setup process, detailing every step to ensure a seamless and functional shopping experience.
Adding a Shop to Your Tour
To begin, navigate to the Virtual Tours section from the side menu and select List Tours. Choose the tour you want to enhance with a shop and click the Edit button. In the tour editor, go to the Shop tab. This menu provides an overview of the steps required to integrate a shop and offers two options: Snipcart and WooCommerce.

Snipcart Integration
Snipcart is a simple and efficient solution for adding e-commerce functionality to your virtual tour. To get started:
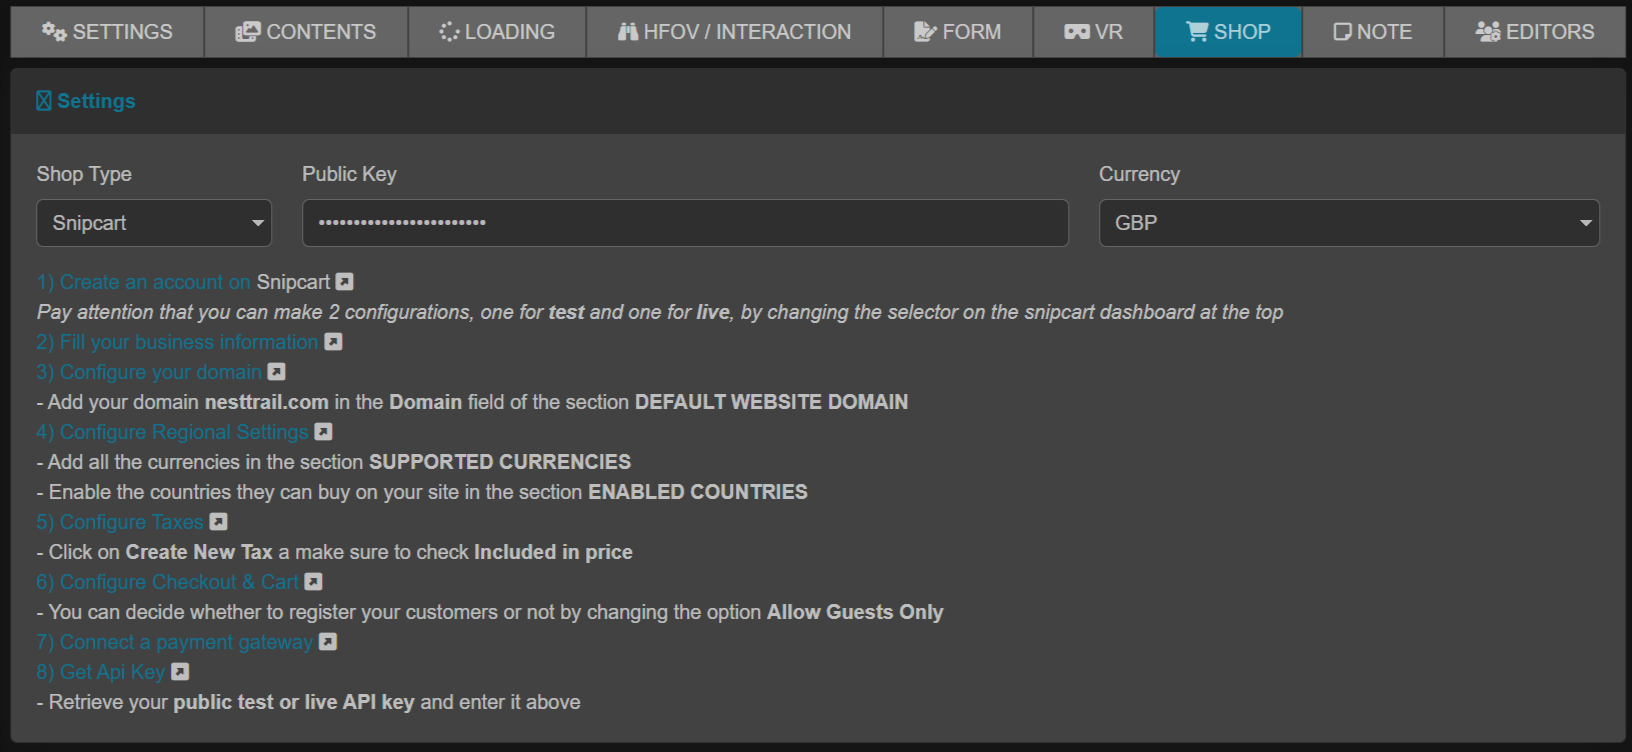
Create a Snipcart Account: Visit the Snipcart website and sign up for an account. Follow the provided instructions to configure your shop settings, such as payment gateways and shipping options.
Add Snipcart Credentials: Once your account is set up, retrieve your Public Key from Snipcart and enter it in the NestTrail Shop settings. Use the dropdown picker to select the currency for your shop.
Creating Products for Snipcart
To add products to your Snipcart-integrated shop:
Navigate to Virtual Tours -> Products from the side menu.
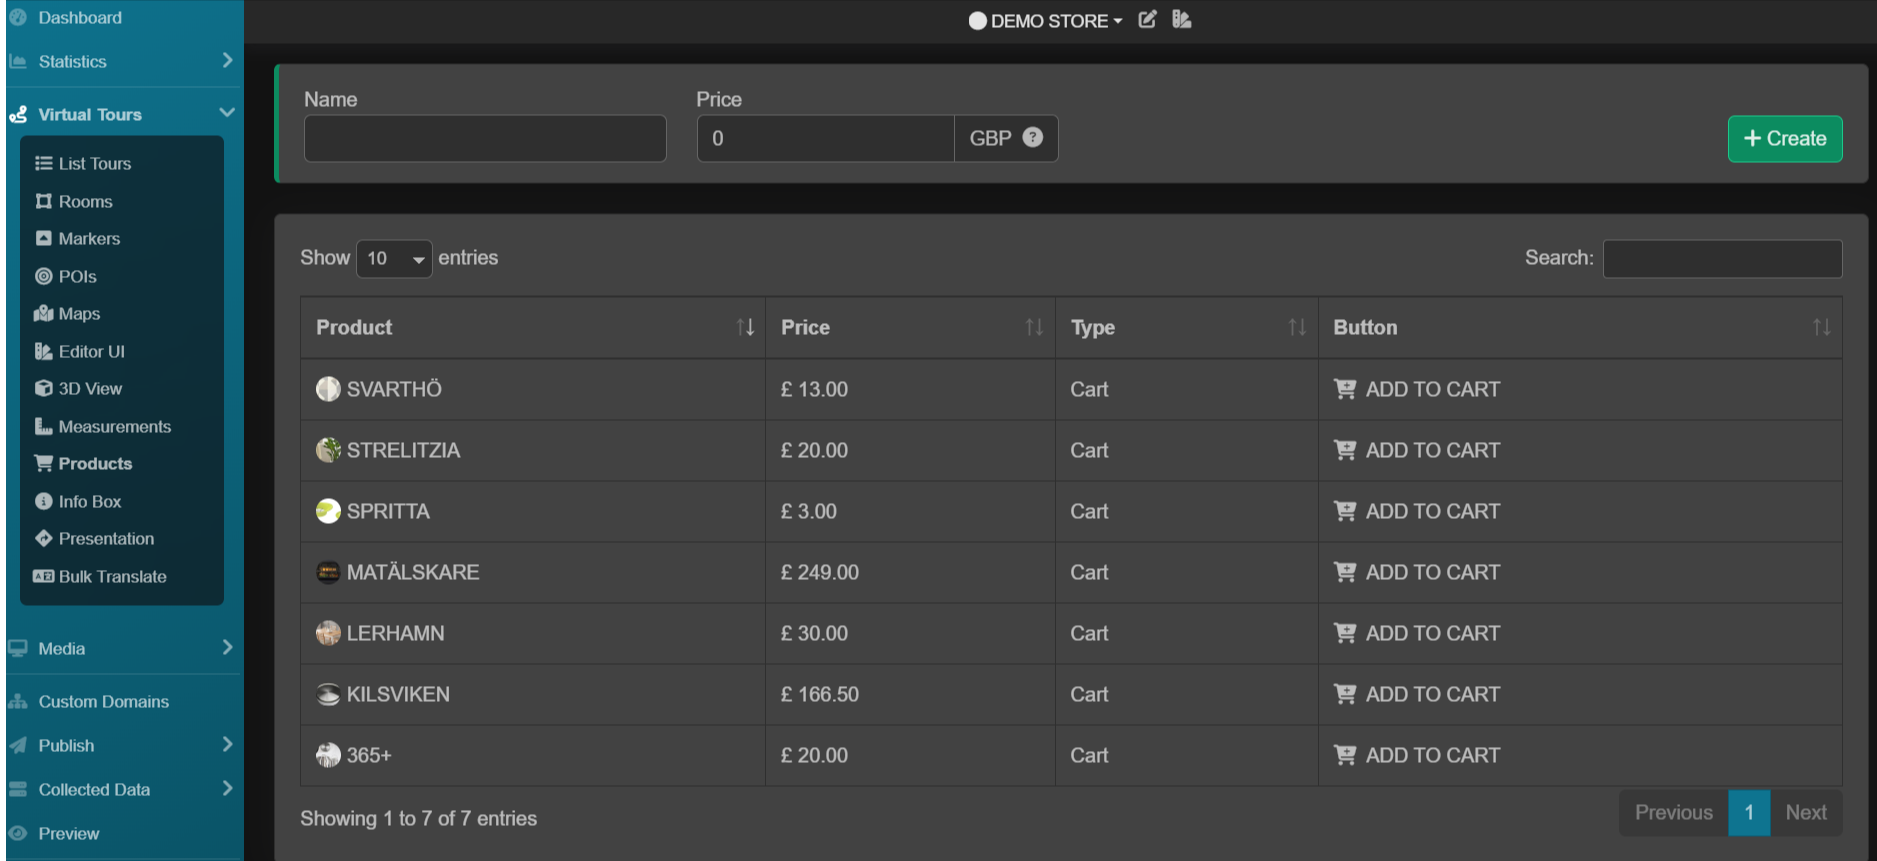
Click the Create button to add a new product. Enter the product name and price, then click Save.
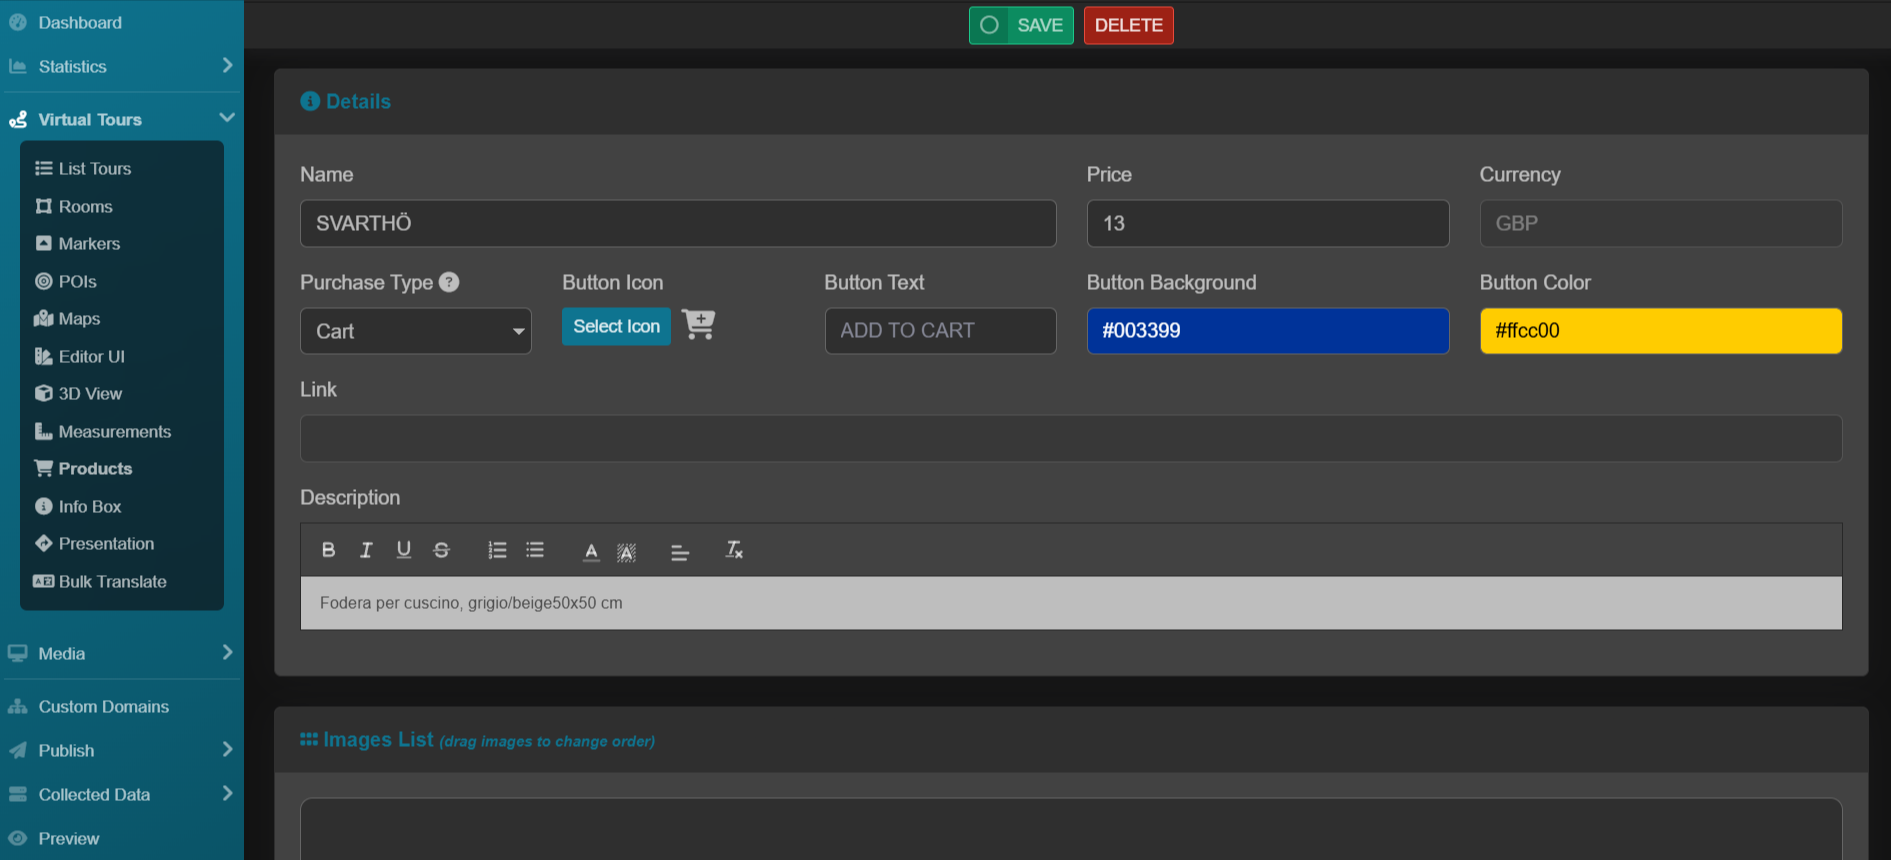
You will be redirected to the product editing page. Here, you can add a detailed description, upload product images, and customize other attributes.
After making changes, click the Save button at the top of the page to finalize the product.
WooCommerce Integration
If you already have a WooCommerce store, you can seamlessly integrate it into your virtual tour using NestTrail. To set up WooCommerce:
Install CoCart Plugin: Log in to your WordPress site and install the CoCart plugin. This plugin enables API functionality for WooCommerce.
Configure NestTrail: In the NestTrail Shop settings, enter your store’s URL, along with the API Customer Key and Secret generated by WooCommerce.
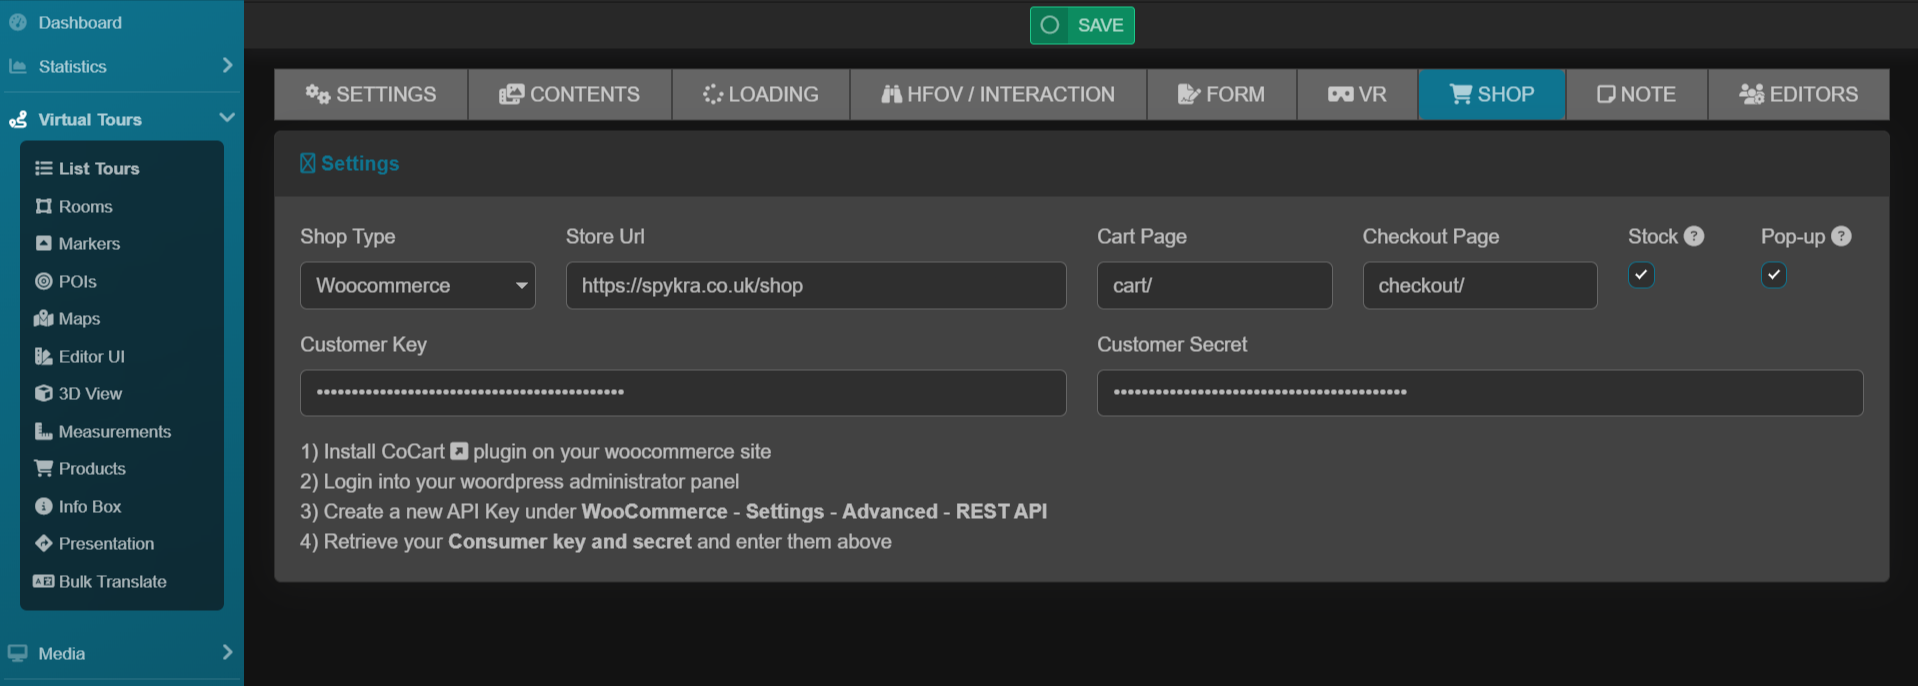
Fix JSON Syntax Errors: If you encounter a JSON syntax error, go to the WordPress admin panel and navigate to Settings -> Permalinks. Change the permalink structure to Post Name to resolve the issue.
Viewing WooCommerce Products
To view your WooCommerce store’s products within NestTrail, go to Virtual Tours -> Products. This allows you to manage and link your existing WooCommerce inventory with your virtual tour.
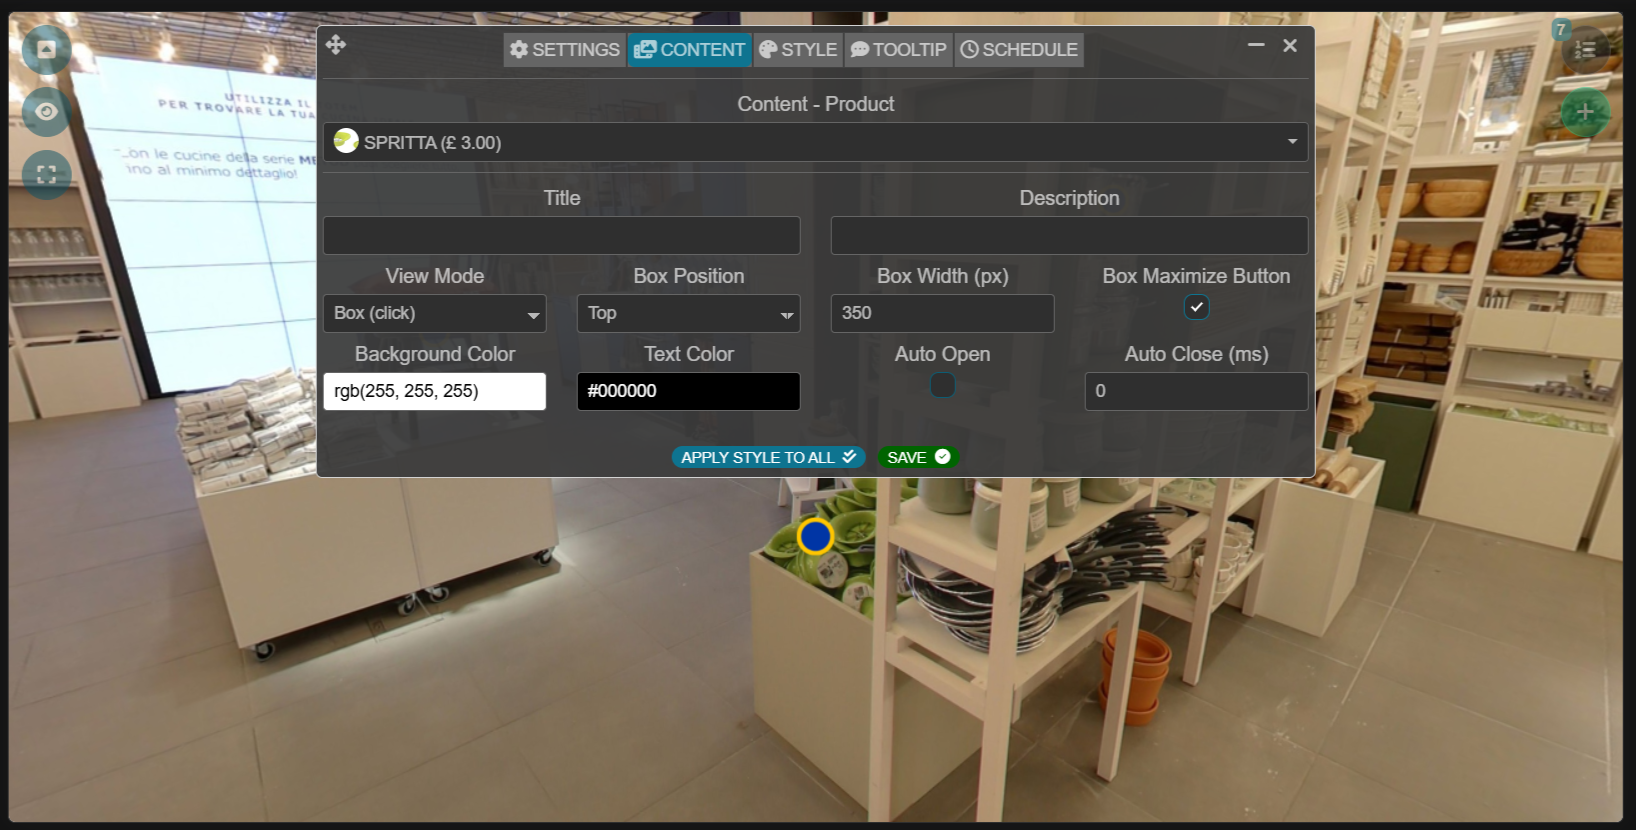
Adding Products to Your Tour
Once your shop is configured, you can add products to specific rooms in your virtual tour using Points of Interest (POIs). Here’s how:
Navigate to Virtual Tours -> POIs from the side menu.
Select the room where you want to add a product and click the + button at the top-right corner.
Choose the Style of the POI and select the Product button in the Content section.
Drag the POI icon to position the product within the room, then click Save.
Assign a product to the POI by selecting it in the Content - Product field and clicking Save again.
Viewing and Testing Your Shop
Once you’ve added products to your tour, preview the shop to ensure everything works as intended. NestTrail provides live demos showcasing Snipcart and WooCommerce integrations. Use these demos to explore how your shop will function and to gather inspiration for customization.
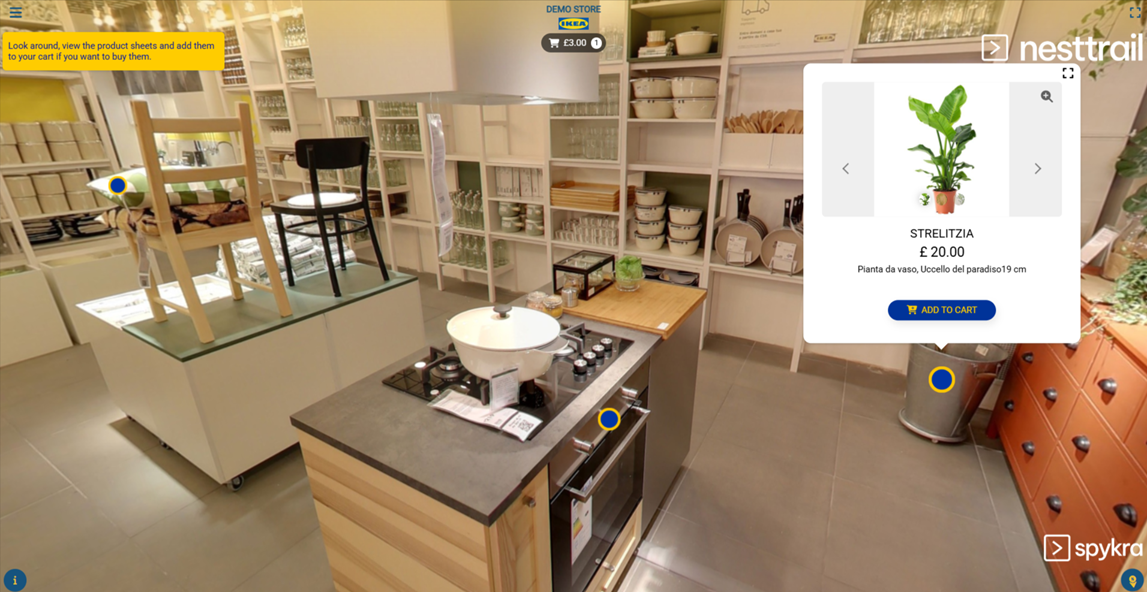
Click here to see in action >>
Benefits of Adding a Shop to Your Virtual Tour
Interactive Shopping: Engage users by allowing them to explore products within an immersive environment.
Flexibility: Choose between Snipcart for simplicity or WooCommerce for leveraging an existing store.
Enhanced User Experience: Provide a seamless and visually appealing shopping experience that integrates directly into your virtual tour.
By following these steps, you can transform your NestTrail virtual tour into a dynamic and interactive e-commerce platform, driving engagement and sales while creating a memorable experience for your audience.