Creating a 3D view, also known as the Dollhouse view, in NestTrail enhances the virtual tour experience by providing users with a fully interactive and immersive layout of the tour space. The 3D view allows users to visualize the spatial relationship between rooms and navigate effortlessly through the environment. This guide walks you through the detailed process of setting up and customizing your 3D view.
Accessing the 3D View Builder
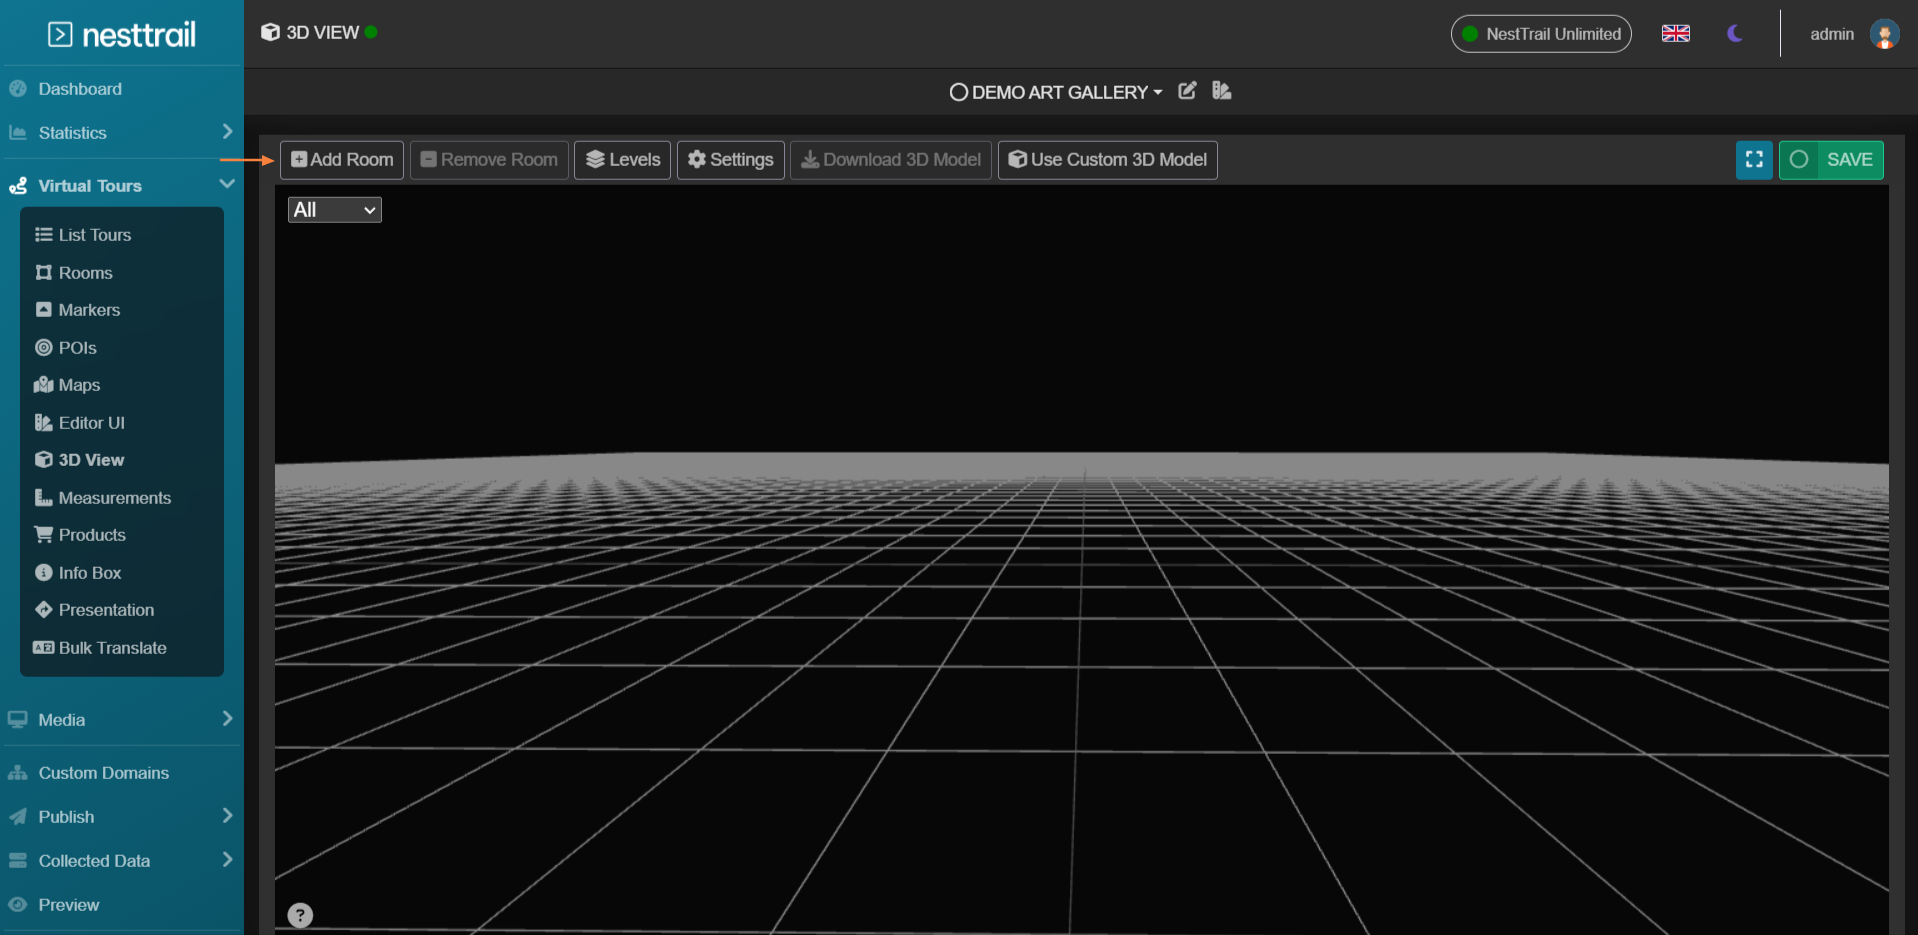
To start creating your 3D view, navigate to the Virtual Tours section from the side menu and select 3D View. Once inside the 3D View builder, you can freely explore and modify the 3D space using intuitive controls:
Click and drag to rotate the view.
Shift + click or right-click + drag to move the view.
Scroll to zoom in and out for a closer or wider perspective.
These navigation controls allow you to position yourself perfectly within the 3D space to begin adding rooms and making adjustments.
Adding Rooms to the 3D View
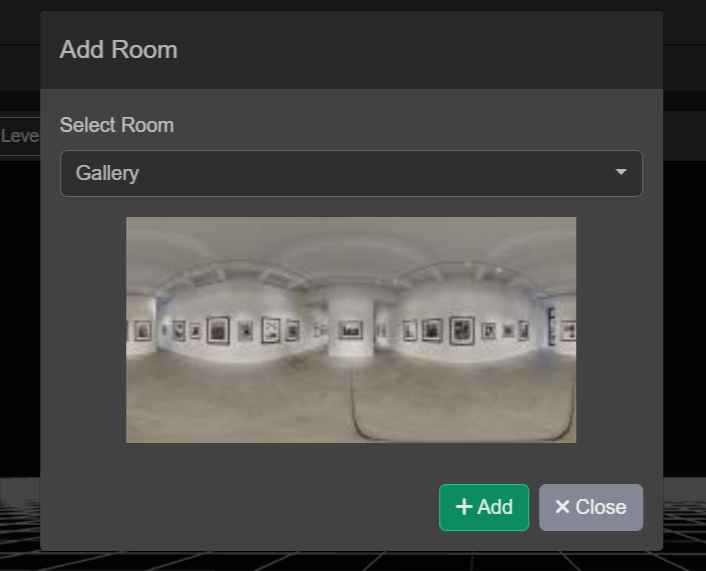
To populate your 3D view, click the + Add Room button located in the top-left corner. A list of available rooms from your current tour will be displayed. Select the desired room and click + Add to place it within the 3D environment.
Once a room is added, you can further customize its properties to achieve the perfect layout. The available customization options include:
Move/Scale Mode: Adjust the size and position of the room manually using your mouse, or input precise values in the side menu for more accuracy.
Room Level: Define the level or floor to which the room belongs, organizing spaces across multiple stories.
Panorama Settings: Modify the room's center point and scale the texture in each direction to ensure the best fit within the 3D space.
Wall Visibility: Toggle walls on or off to control the visibility of certain structural elements.
Pointer Position and Visibility: Modify the placement of navigational pointers within the room to improve the user experience.
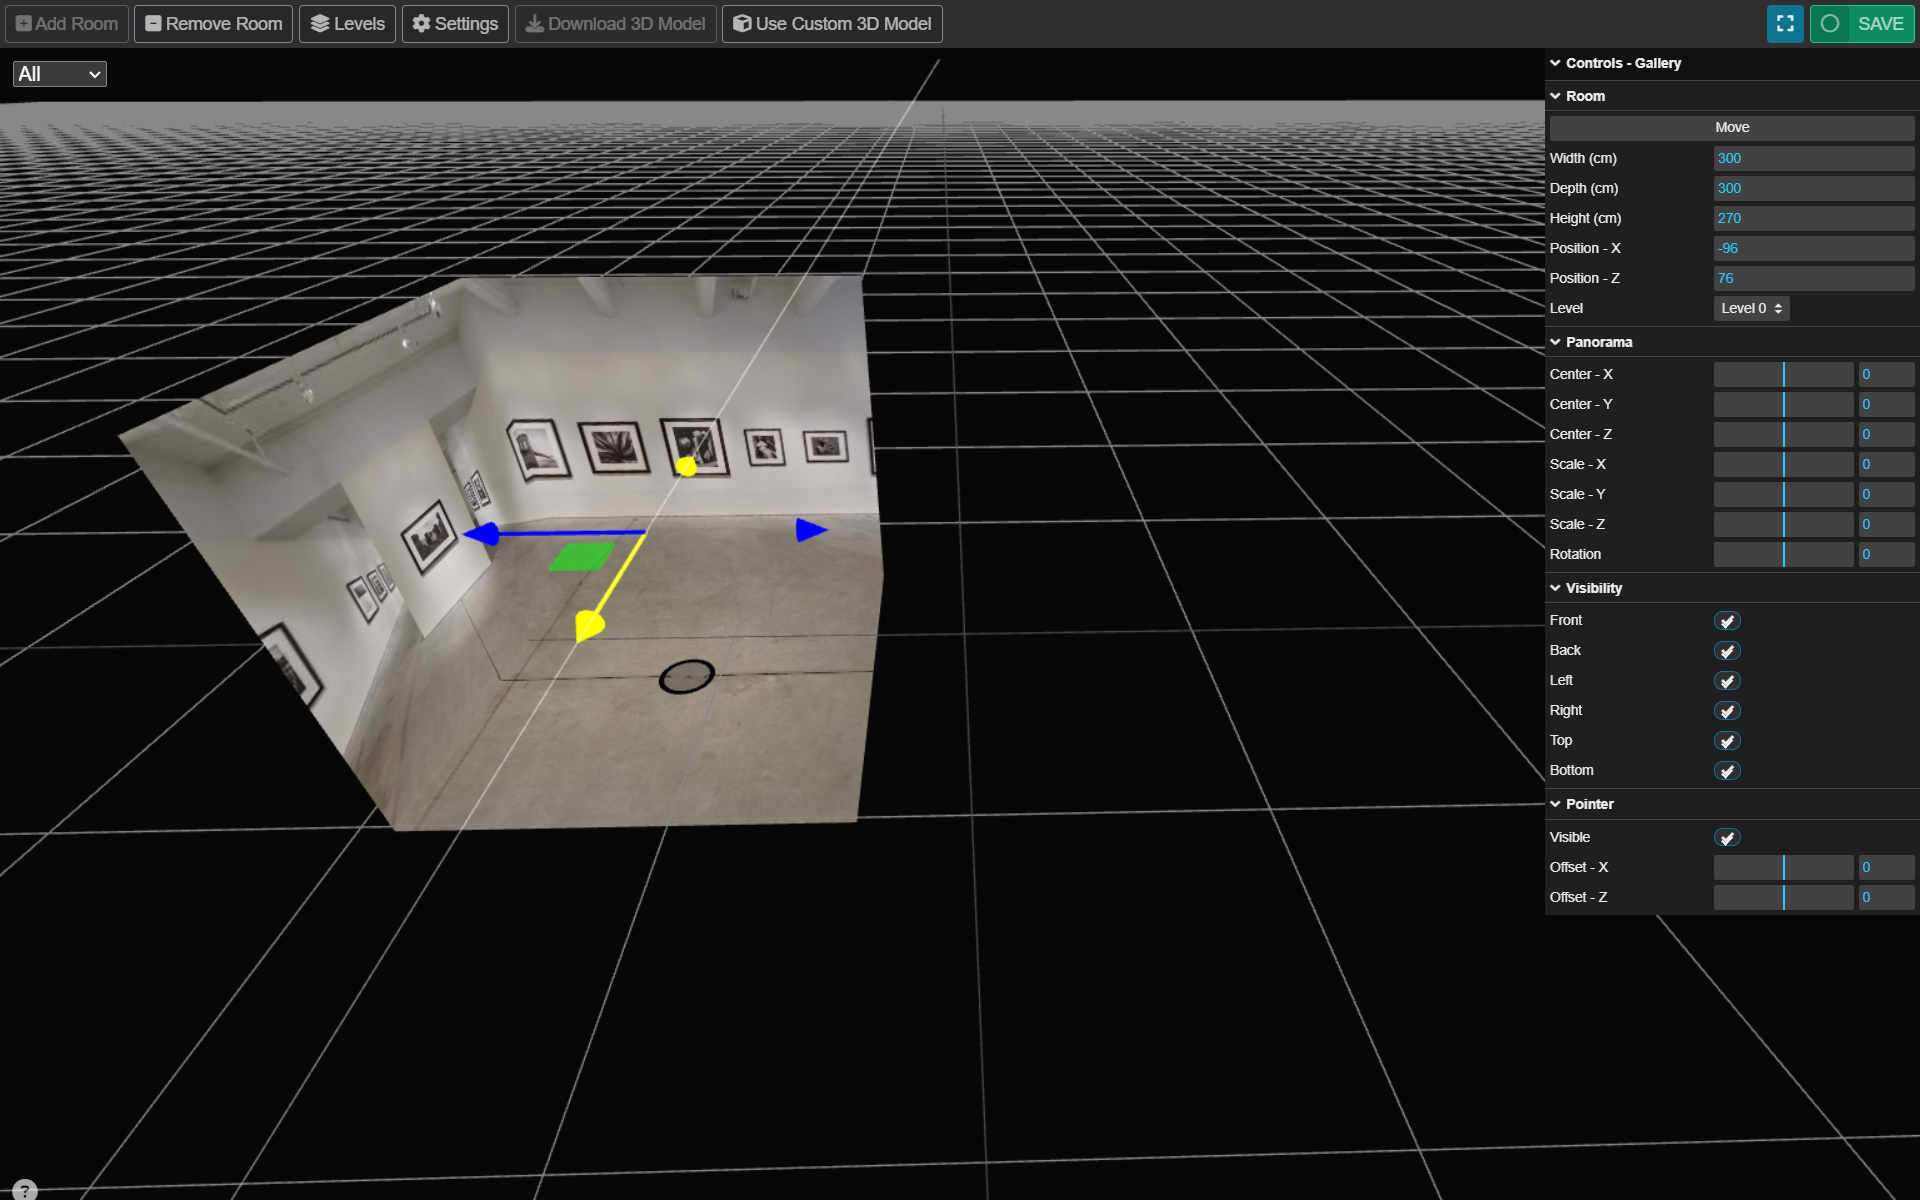
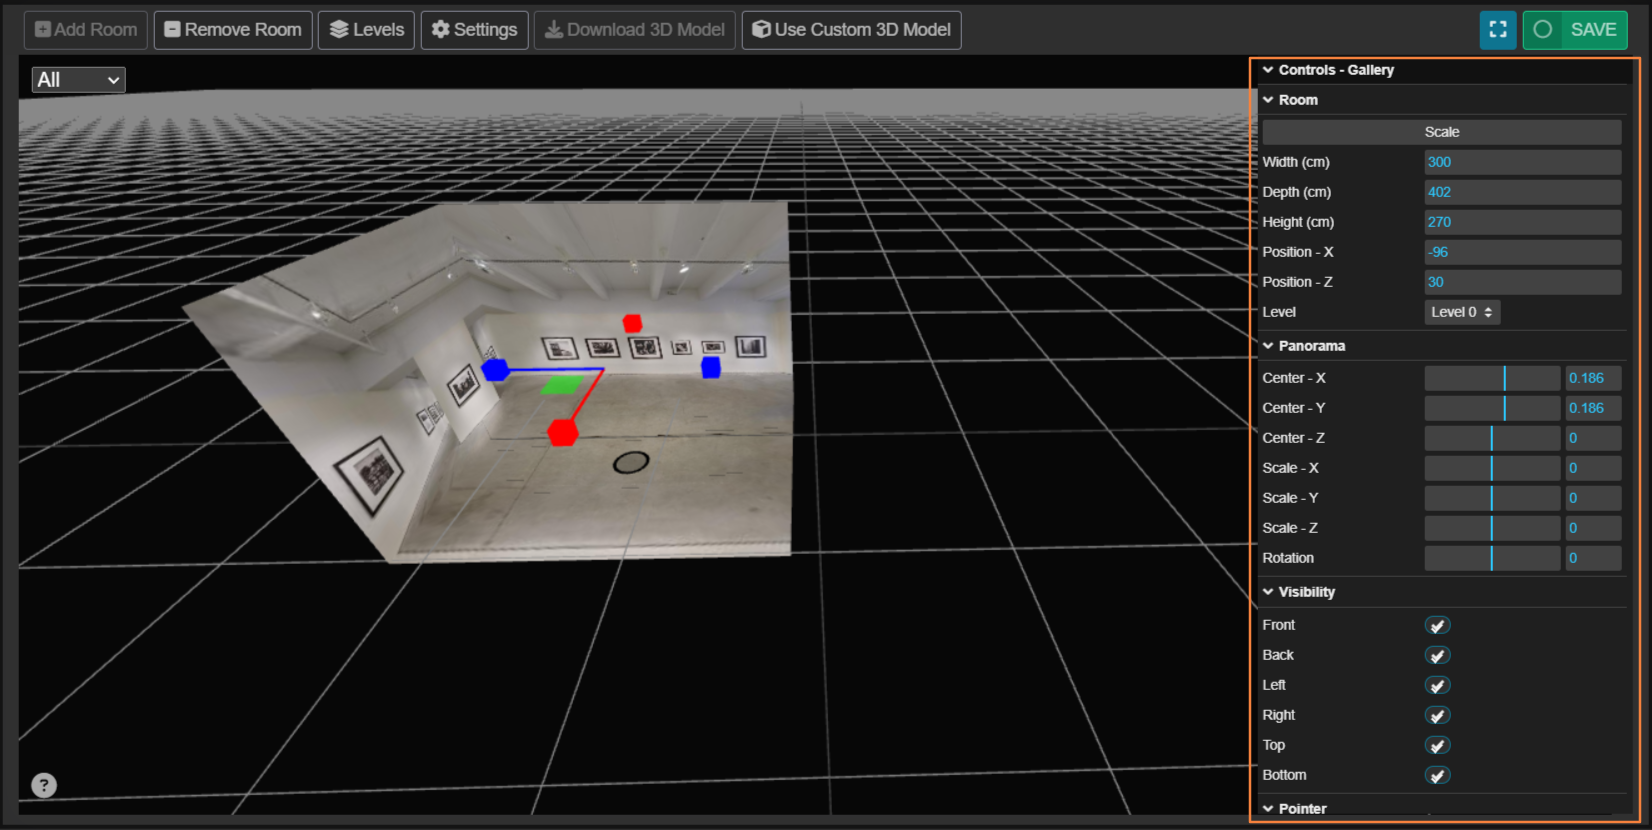
After fine-tuning these parameters, the room will be positioned and displayed accurately within the 3D view.
Managing Additional Rooms and Levels
Once you've placed your first room, you can continue adding more by repeating the same process. Subsequent rooms will be positioned adjacent to the previously placed ones. Double-click on any room to switch between editing different rooms.
Additional options available include:
Removing a Room: Remove a selected room from the 3D view if no longer needed.
Levels Management: Change level names and set different height values to organize the space efficiently.
3D View Settings: Customize various visual and functional settings to enhance the user experience.

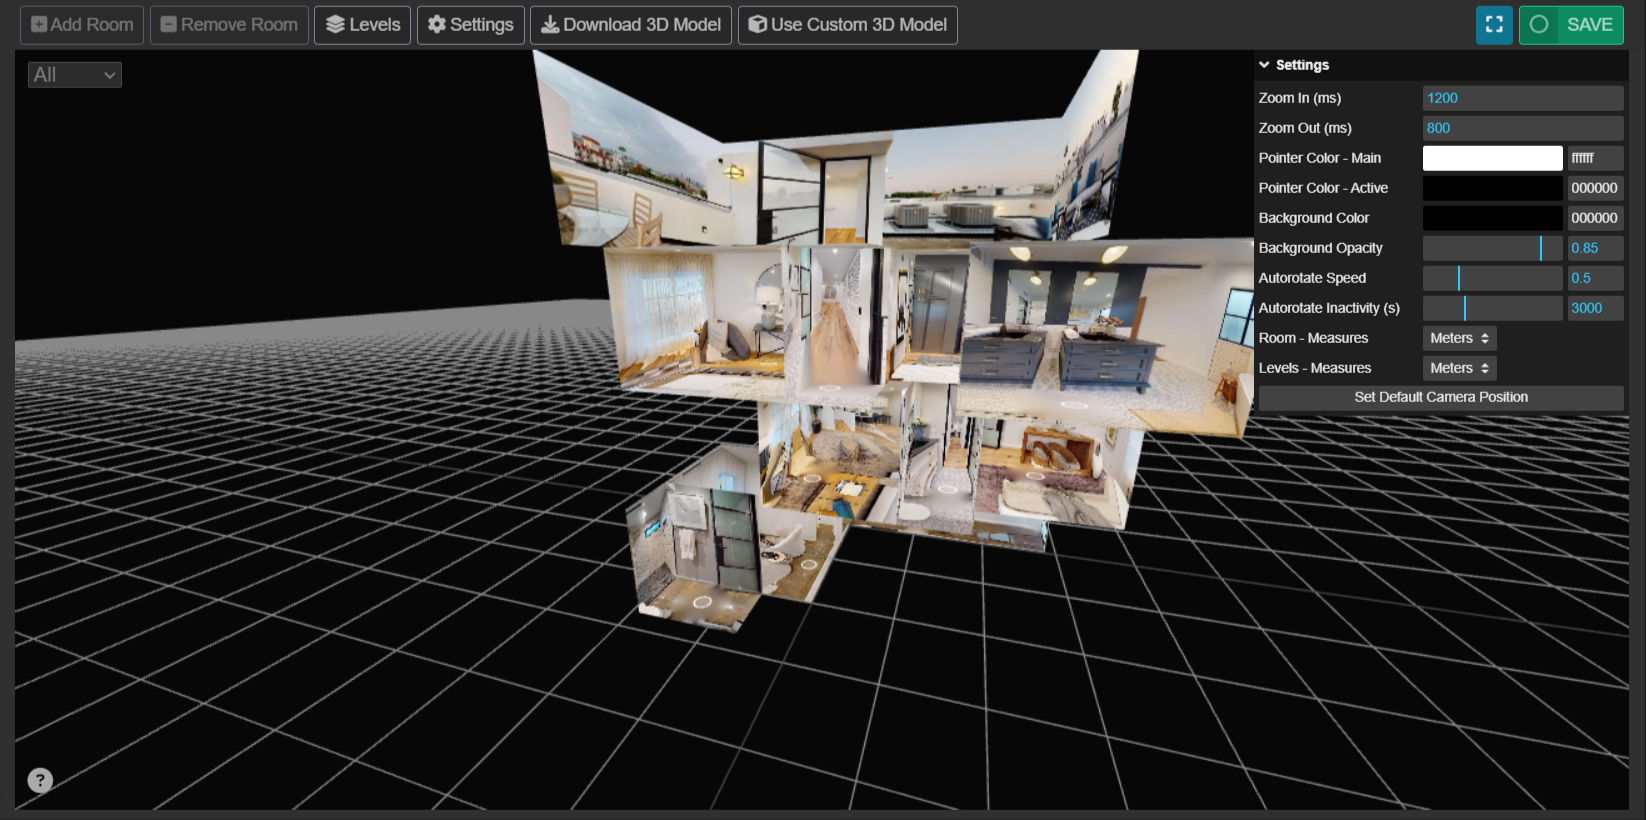
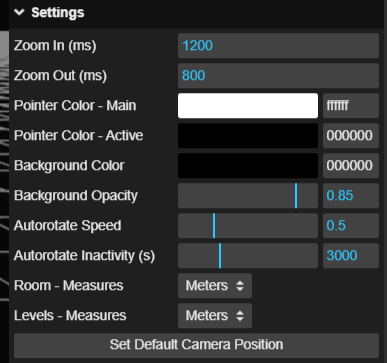
Configuring 3D View Settings
NestTrail provides several settings to fine-tune the appearance and functionality of your 3D view. The following options can be adjusted:
Zoom In/Out Speed: Set the duration (in milliseconds) for the transition between normal and 3D views.
Point Colors: Customize the colors of the navigation pointers, including the standard and active room colors.
Background Color & Opacity: Change the background color and adjust transparency to match your branding or design preferences.
Autorotate Speed: Define the automatic rotation speed of the 3D view for better presentation.
Autorotate Inactivity: Set a time delay after which the 3D view will start rotating automatically if no user interaction occurs.
Measurement Units: Choose between meters or inches for room dimensions and layouts.
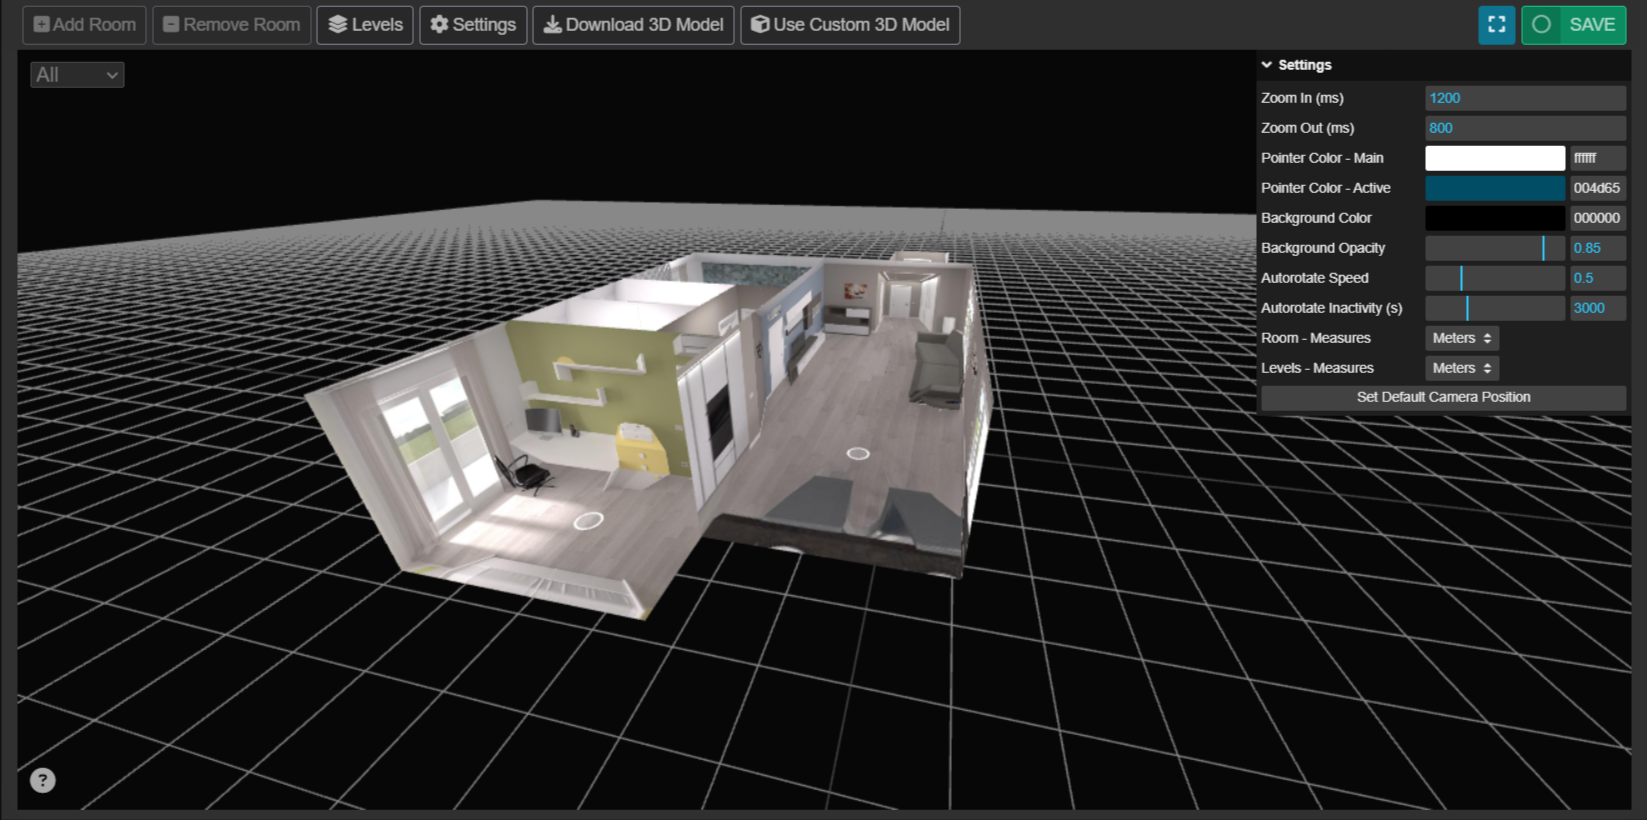
Once all rooms and settings are properly configured, the final result will provide users with an engaging 3D representation of the space.
Activating the 3D View in the Tour
After completing the setup, you must activate the 3D view within the virtual tour. To do this, navigate to Virtual Tours -> Editor UI from the side menu. Locate the 3D View icon and set it to Show as Visible.
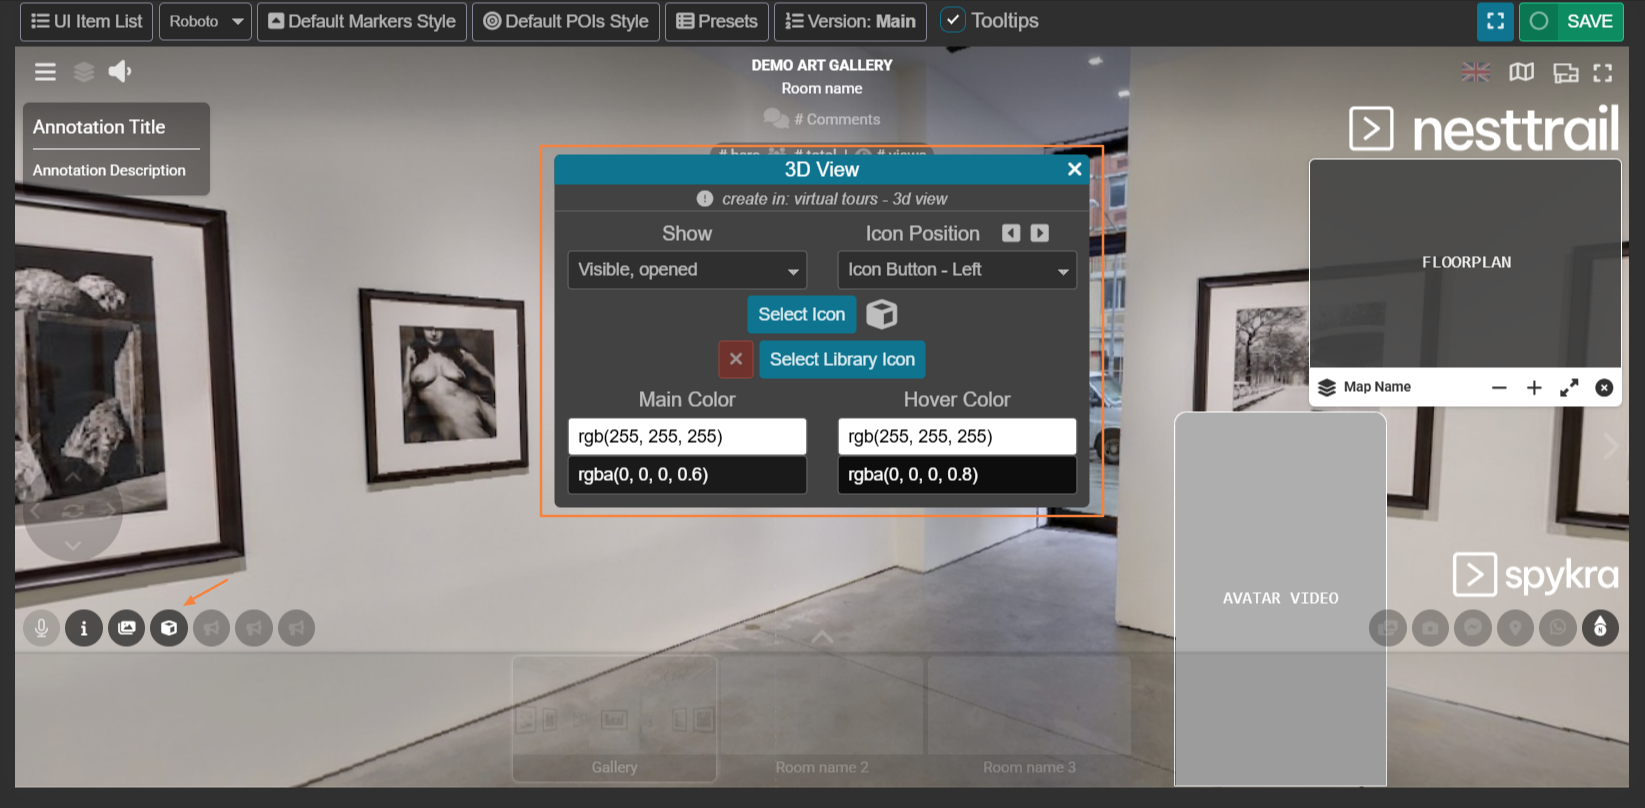
Finally, click Save at the top-right corner to ensure your settings are applied.
Previewing and Finalizing
Once everything is set up, preview your 3D view to ensure it meets your expectations. NestTrail also provides a speed-up tutorial video and a live demo showcasing the 3D View feature. Take advantage of these resources to refine your virtual tour and deliver the best experience to your users.
By following these steps, you can successfully create and customize a 3D Dollhouse view in NestTrail, offering users an intuitive way to explore spaces with realistic navigation and visual appeal.