This guide explains how to create a virtual tour specifically using the NestTrail application.
Creating a virtual tour in NestTrail is a simple and straightforward process. Follow the steps below to create and manage your virtual tours:
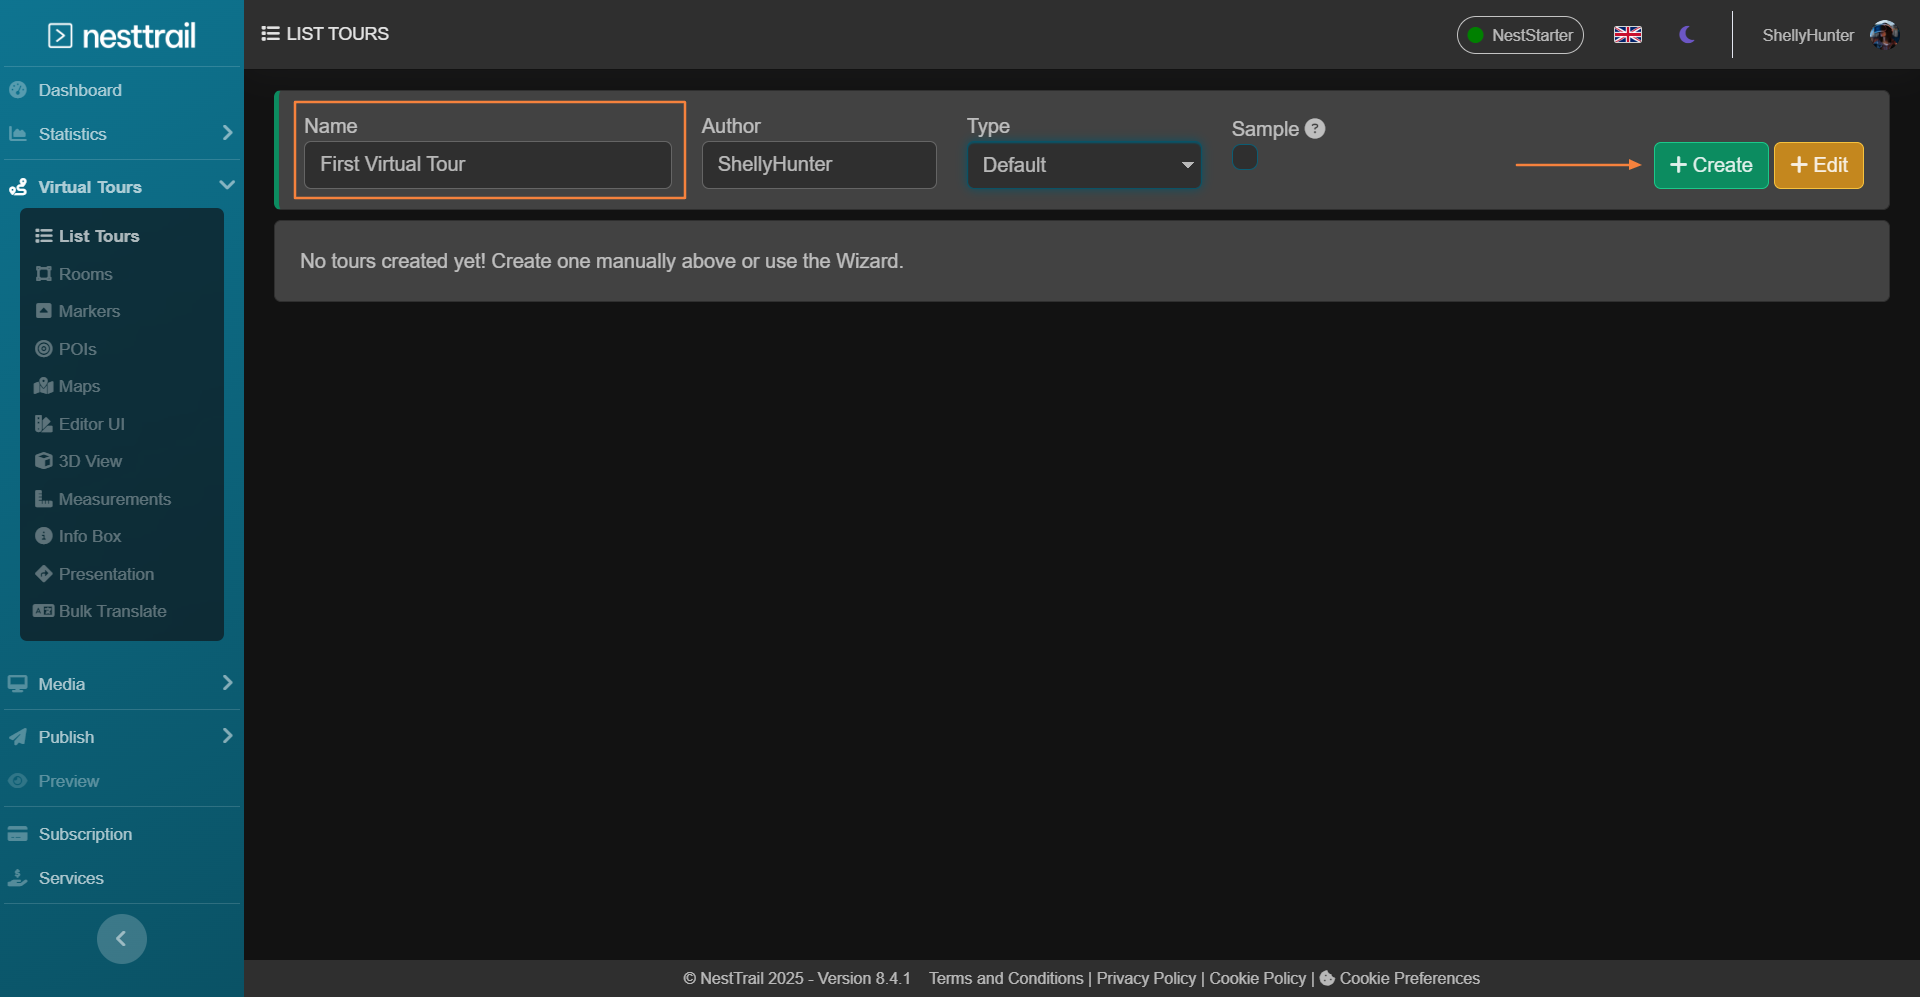
1. Access the Virtual Tours Section
From the side menu on the left side of the dashboard, navigate to Virtual Tours and select List Tours.
2. Add a New Tour
At the top of the screen, locate the fields for entering tour information.
Fill in the following details:
Name: Enter the desired name for your new virtual tour.
Author: This field is pre-filled with your name by default, but you can edit it if needed.
Sample Data: If you want the tour to contain sample data, select the Sample checkbox.
Confirm the creation of the tour by clicking the + Create button.
3. View and Manage the Newly Created Tour
The newly created tour will appear in the list of your tours.
To change the name of the tour, click the pencil icon beside the tour’s name and edit it as needed.
4. Explore Tour Functionalities
On the right-hand side of the screen, a list of functionalities will be displayed, including options to edit the tour’s content, manage its settings, and share the tour with others. These options allow you to:
Edit the tour’s content.
Manage various aspects of the tour.
Share the tour with others.
5. Add Rooms to the Tour
Once the tour is created, the next step is to add rooms to it. This feature enables you to customize the virtual tour further by including specific rooms, details, and interactive elements.
Follow these steps to continue building your virtual tour with rooms and other features! Rooms in NestTrail represent individual spaces or locations within the virtual tour, such as living rooms, offices, or exhibition halls. Adding rooms helps to structure your tour and provide a more immersive experience for viewers.