Transitions between rooms in your virtual tour play a crucial role in creating a seamless and immersive experience for your users. NestTrail allows you to customize the transition effects, durations, and various other settings either for the entire tour or for specific rooms individually. This guide will walk you through the detailed process of adjusting room transitions to enhance the navigation experience.
Changing Transitions for the Entire Tour
To change the transition settings for the entire tour, start by navigating to the Virtual Tours section from the side menu and selecting List Tours. Find the tour you wish to customize and click the Edit button to access its settings. Once inside the tour editor, scroll down to the Transition section, where you can fine-tune various transition parameters to control how users move between rooms.

Transition Settings Overview
In the transition section, you have access to multiple settings that influence the behavior of your virtual tour when changing rooms. Here’s a breakdown of each setting:
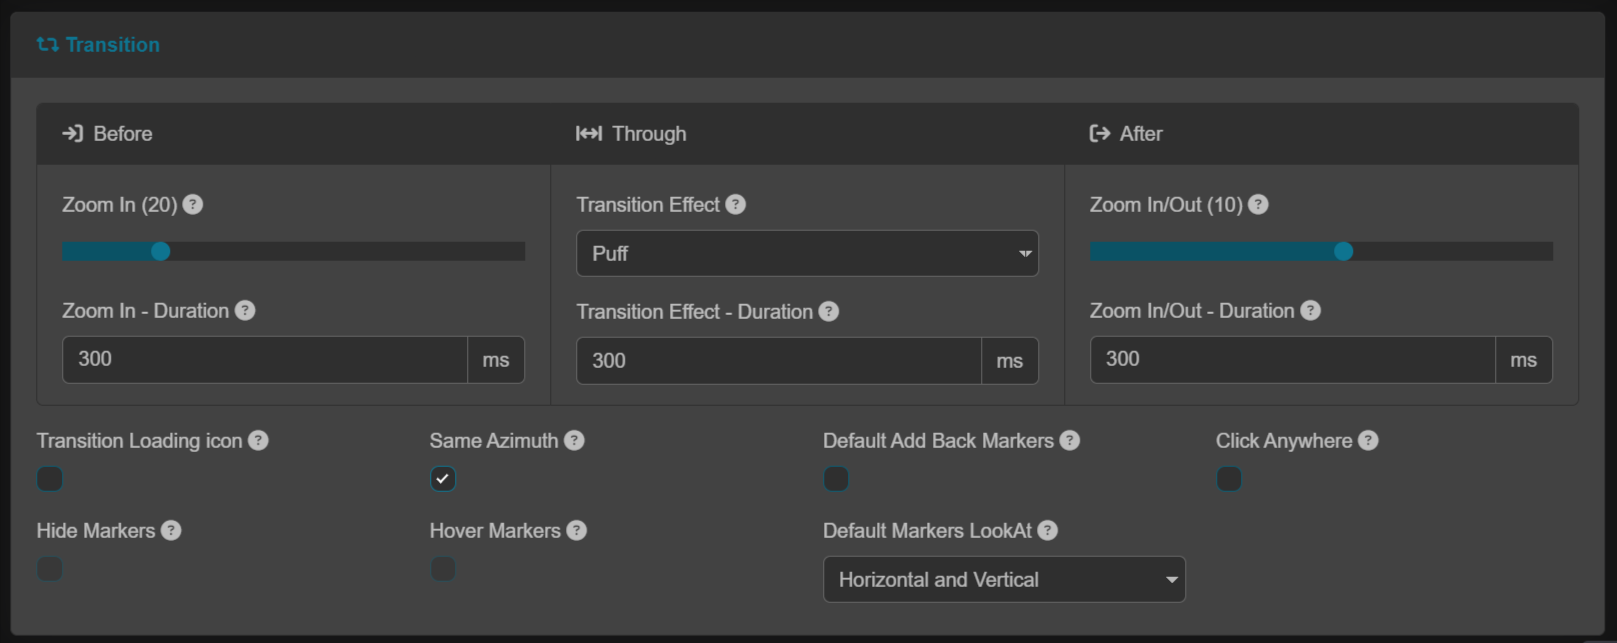
Transition Effect: This setting allows you to choose an animation effect that will occur when switching between two rooms. Options may include fade effects, slide transitions, or other visually appealing animations.
Transition Duration: Determines how long the transition animation lasts. Setting an appropriate duration helps create a smooth flow without making the transition feel too slow or too fast.
Transition Zoom Time: Specifies the duration of the zoom effect that occurs when a user clicks on a room marker.
Transition Zoom Level: Controls how much the view zooms in before entering the next room. Adjusting this can help users feel a greater sense of movement and immersion.
Transition Loading Icon: Allows you to enable or customize the loading icon that appears during room transitions, giving users visual feedback while the next room loads.
Same Azimuth: When enabled, this option ensures that the directional orientation remains consistent with respect to north across all rooms. To use this, you need to set the north position in each room manually.
Default Add Back Markers: This setting automatically places a "back" marker in newly added rooms, allowing users to return to the previous location with ease.
Click Anywhere: When enabled, users can click anywhere near the marker to navigate to the corresponding room rather than having to click directly on the marker.
Hide Markers: If the "Click Anywhere" option is enabled, this setting allows you to hide all markers, providing a cleaner visual experience.
Hover Markers: When enabled, hidden markers will appear when the user hovers over them, maintaining functionality while keeping the interface uncluttered.
Default Markers LookAt: Sets a default viewing direction when adding a new marker, ensuring a consistent visual perspective when users enter a room.
Once you have configured the transition settings according to your preferences, click the Save button at the top of the page to apply your changes.
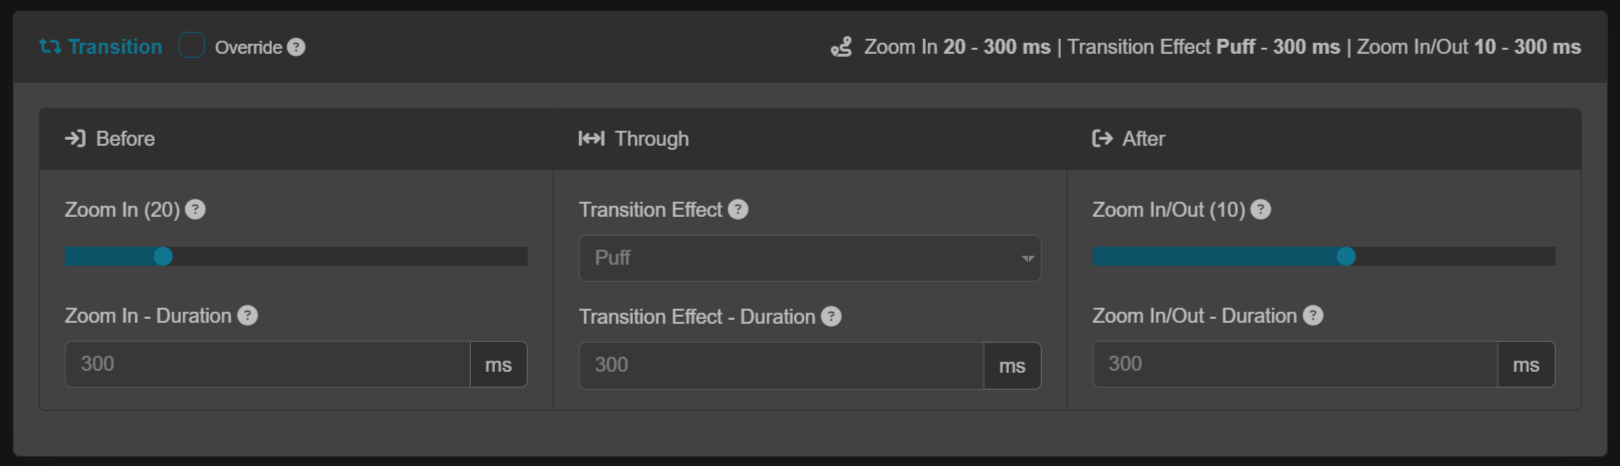
Changing Transitions for a Specific Room
If you prefer to have different transition effects for specific rooms within your tour, you can override the global transition settings. To do this, navigate to Virtual Tours -> Rooms from the side menu and select the desired room by clicking the Edit button.

In the room settings page, scroll down to the Transition section and click the Override button. This action allows you to configure custom transition effects specifically for that room, independent of the global tour settings. After making the desired changes, click Save at the top of the page to apply them.
Best Practices for Transition Optimization
To ensure a smooth and engaging user experience, consider the following tips when customizing transitions:
Keep Transitions Consistent: While customizing different rooms can add uniqueness, maintaining consistency across the tour ensures a cohesive experience.
Optimize Transition Durations: Avoid overly long transitions that might disengage users; instead, aim for a balance between speed and smoothness.
Use Click Anywhere Thoughtfully: If enabled, ensure users can intuitively navigate without confusion.
Test Across Devices: Preview the tour on both desktop and mobile devices to verify that transitions work well across different screen sizes.
By utilizing NestTrail’s transition settings effectively, you can create a professional and immersive virtual tour experience that guides users effortlessly from one room to another. Whether applying global settings or customizing transitions for specific rooms, these features provide flexibility and control to enhance your virtual tour.