Creating a seamless and immersive virtual tour in NestTrail requires establishing effective navigation between rooms. This is achieved by connecting rooms using markers. Markers are interactive, clickable points within a room that allow users to navigate to the next location, simulating the experience of an actual tour. This guide explains how to connect rooms using markers and customize their functionality and appearance.
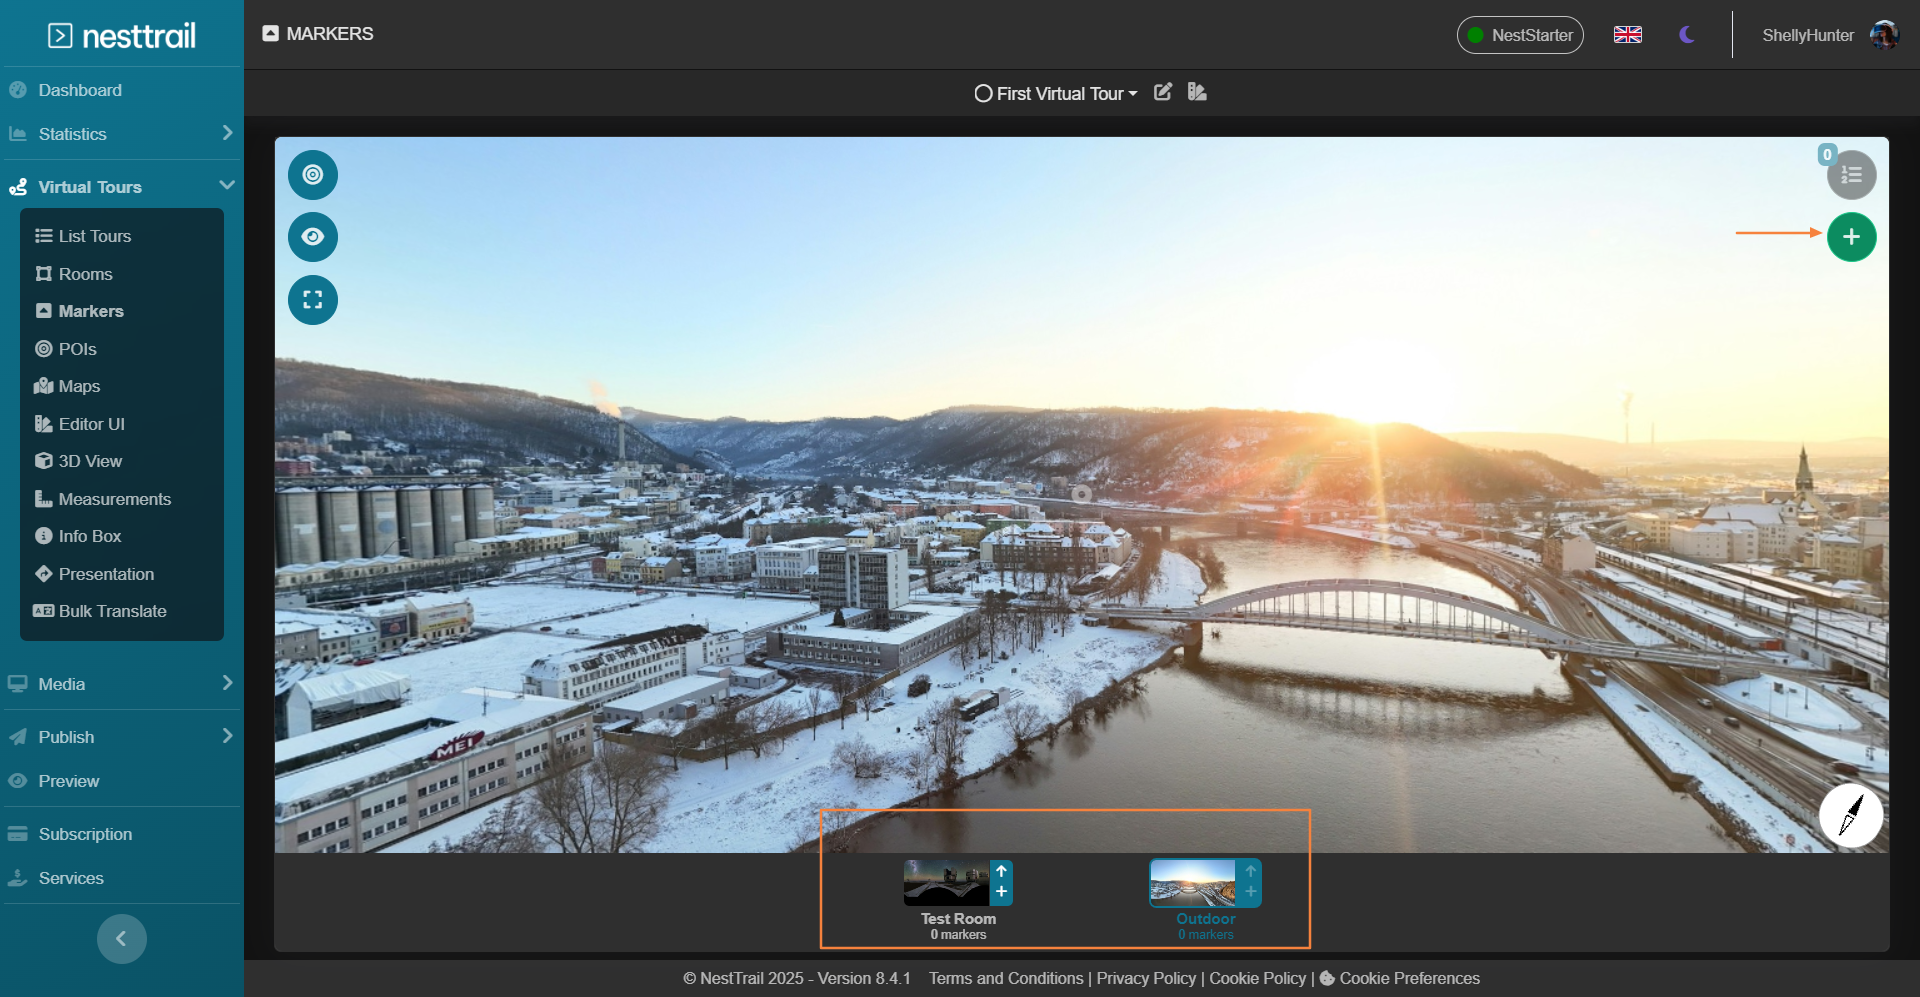
To begin, navigate to the Virtual Tours section in the side menu and select Markers. Once there, choose the room where you want to add a marker and click on the "+" button located at the top right corner of the screen. This action will open the Add Marker window, where you can configure the details of the navigation marker.
In the Add Marker window, you can define several properties for the marker to tailor the navigation experience. Start by selecting the Marker Style. NestTrail offers two styles:
Icon: A simple clickable icon that serves as the marker.
Selection Area: A defined area that acts as the navigation element, allowing for more creative and customized shapes.
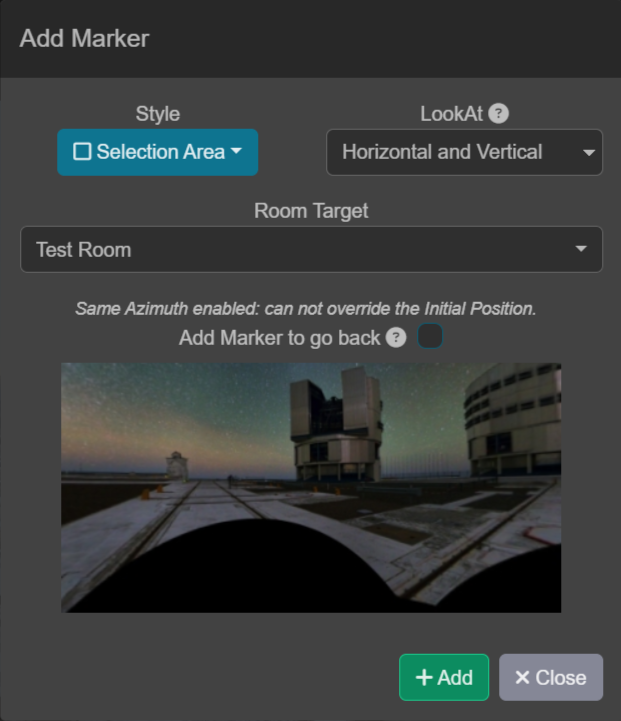
Next, configure the Look At option to set the direction the user’s view will face when the marker is clicked. This feature ensures smooth transitions between rooms, enhancing the immersive experience. Specify the Room Target, which determines the room to which the marker will lead the user upon interaction. For added control, you can enable the Override Initial Position setting to define the exact position and orientation the user will see when they enter the target room.
To enhance navigation, you can also enable the Add Marker to Go Back option. This feature automatically places a marker in the target room, allowing users to return to the previous room with a single click. Once all configurations are complete, click the + Add button to create the marker.
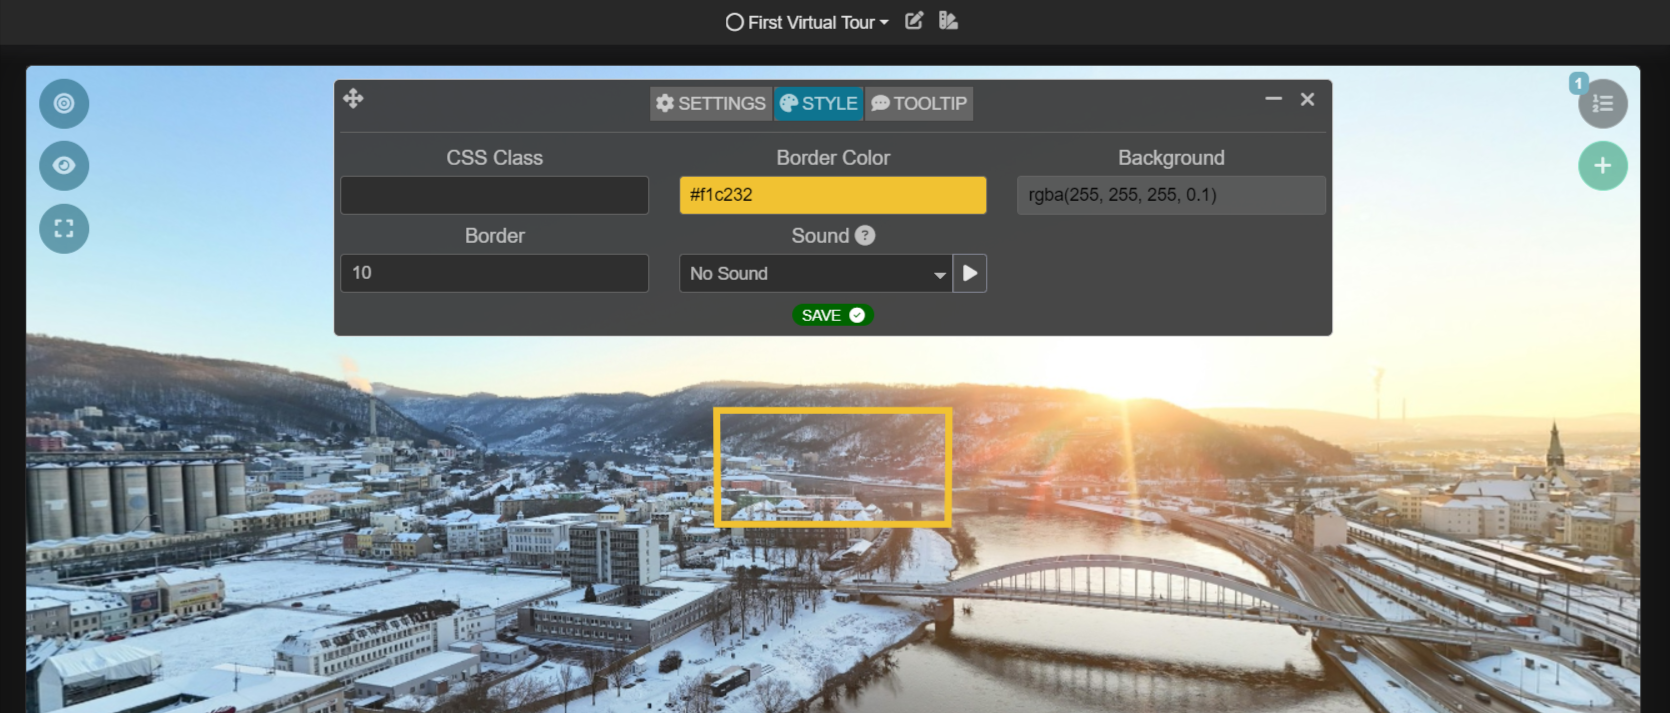
If you choose the Icon style, you can further customize the marker’s position and properties. Drag the marker to the desired location within the room and adjust its Perspective, Size, Visibility, Z Order, and Scale. For the Selection Area style, define the area where the navigation element will appear and draw a shape that suits your design preferences.
NestTrail also provides shortcuts to streamline the marker creation process. In the room thumbnails, use the up arrow icon to quickly add a marker at the center pointer, or click the + icon to open the Add Marker modal with the target room already selected.
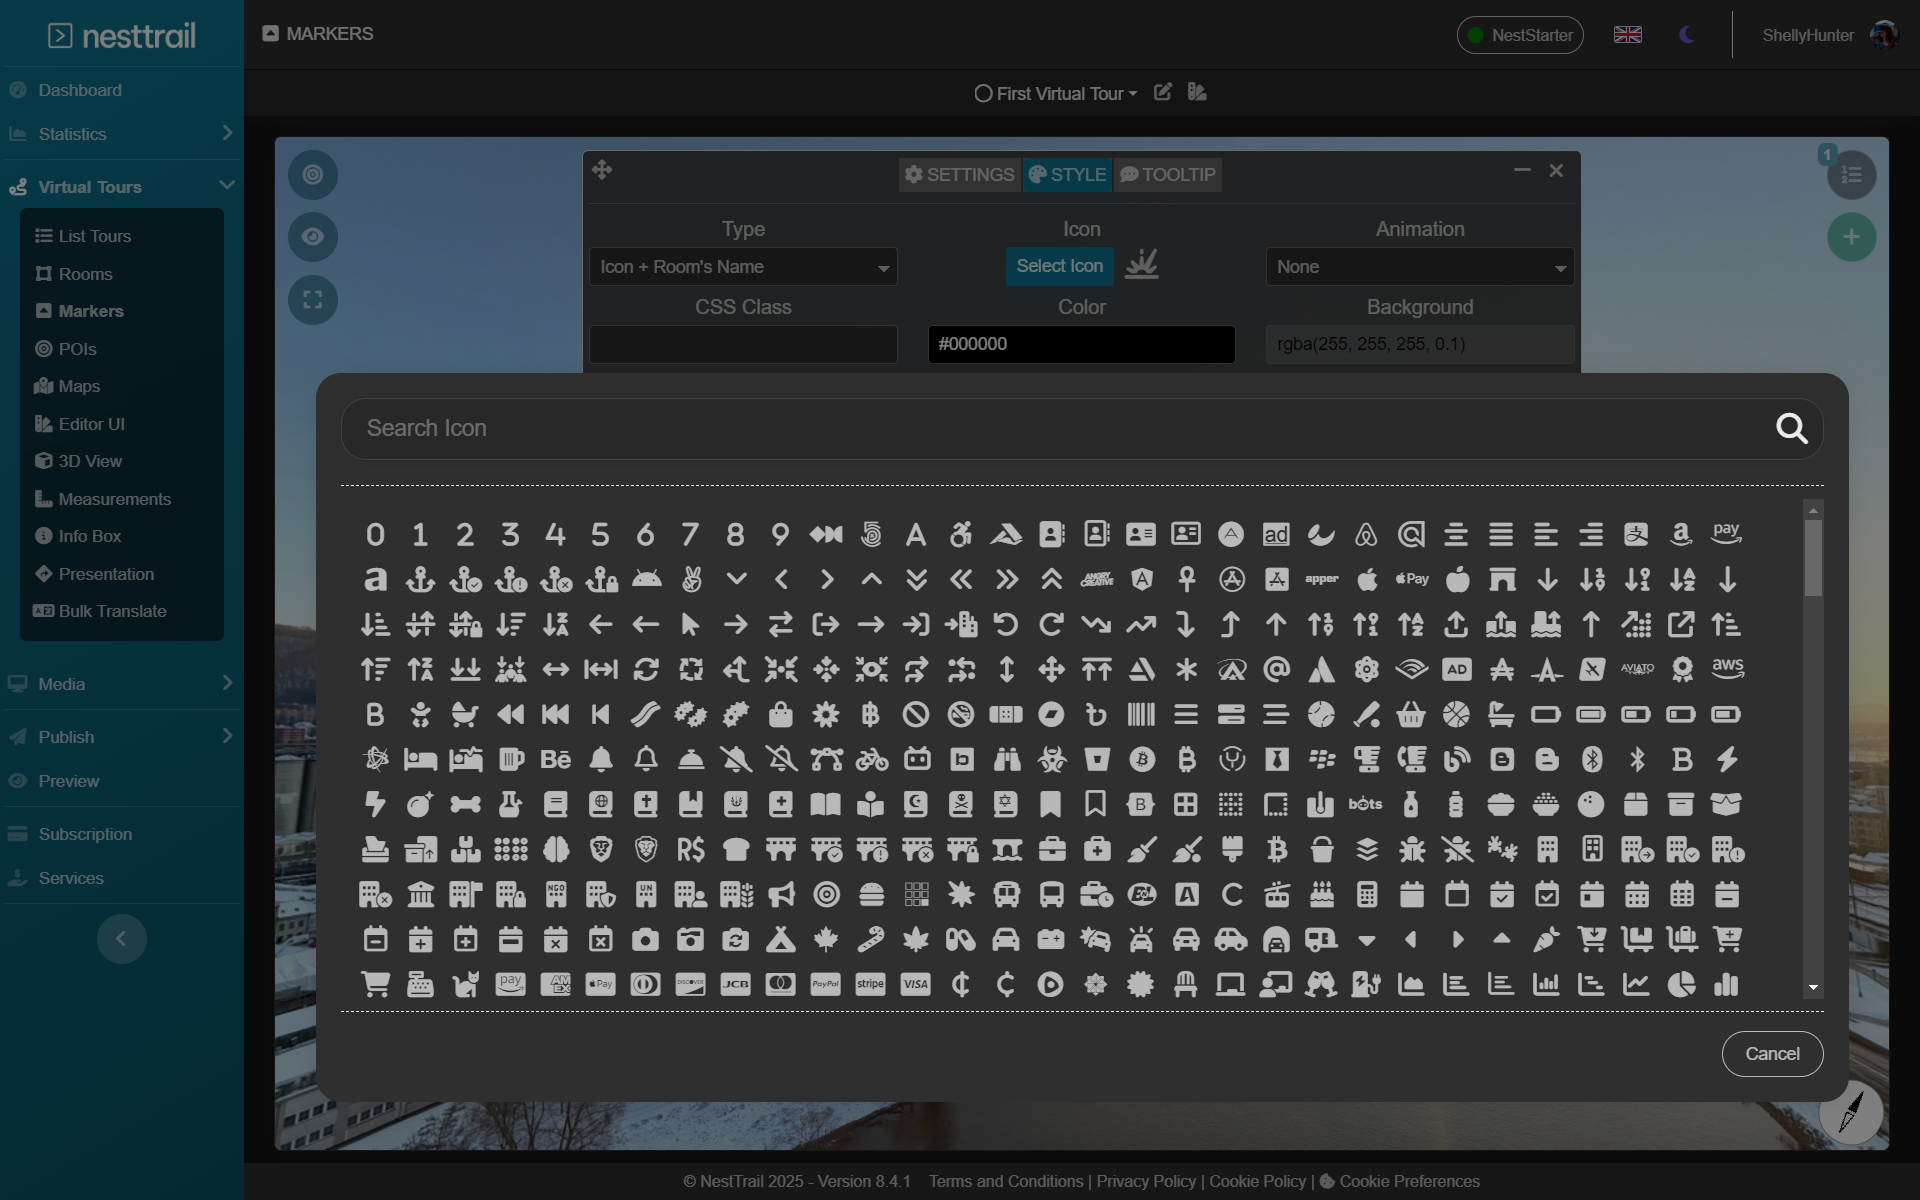
Once a marker is created, it can be edited at any time. Clicking on the marker opens a small menu that allows you to move it, edit its style, delete it, or go directly to the target room. Selecting the edit icon opens a pop-up with three tabs:
Settings: Change the marker type or update the room target.
Style: Customize the appearance of the marker icon.
Tooltip: Add a tooltip text or room image that appears when hovering over the marker.
After making changes, remember to click Save to apply the updates.
When all markers are in place, you can preview the navigation in your virtual tour by clicking the eye icon located at the top left of the screen. This preview mode allows you to test the connections between rooms and ensure a smooth and engaging user experience.
By following these steps, you can effectively connect rooms in your NestTrail virtual tour using markers. With customizable styles, advanced settings, and shortcuts for efficiency, markers provide a powerful tool for creating an intuitive and visually appealing navigation experience for your audience.