Adding a logo to your virtual tour in NestTrail is an effective way to promote your brand and enhance recognition. By displaying your company or organization’s logo within the virtual tour interface, you can ensure consistent branding and create a professional look. This guide provides step-by-step instructions for adding and customizing your logo in a virtual tour.
Uploading Your Logo
To begin, navigate to the Virtual Tours section from the side menu and select List Tours. Locate the tour you want to customize and click the Edit button next to it. In the tour editor, go to the Content / Logo tab. This section is specifically designed for uploading and managing your logo.

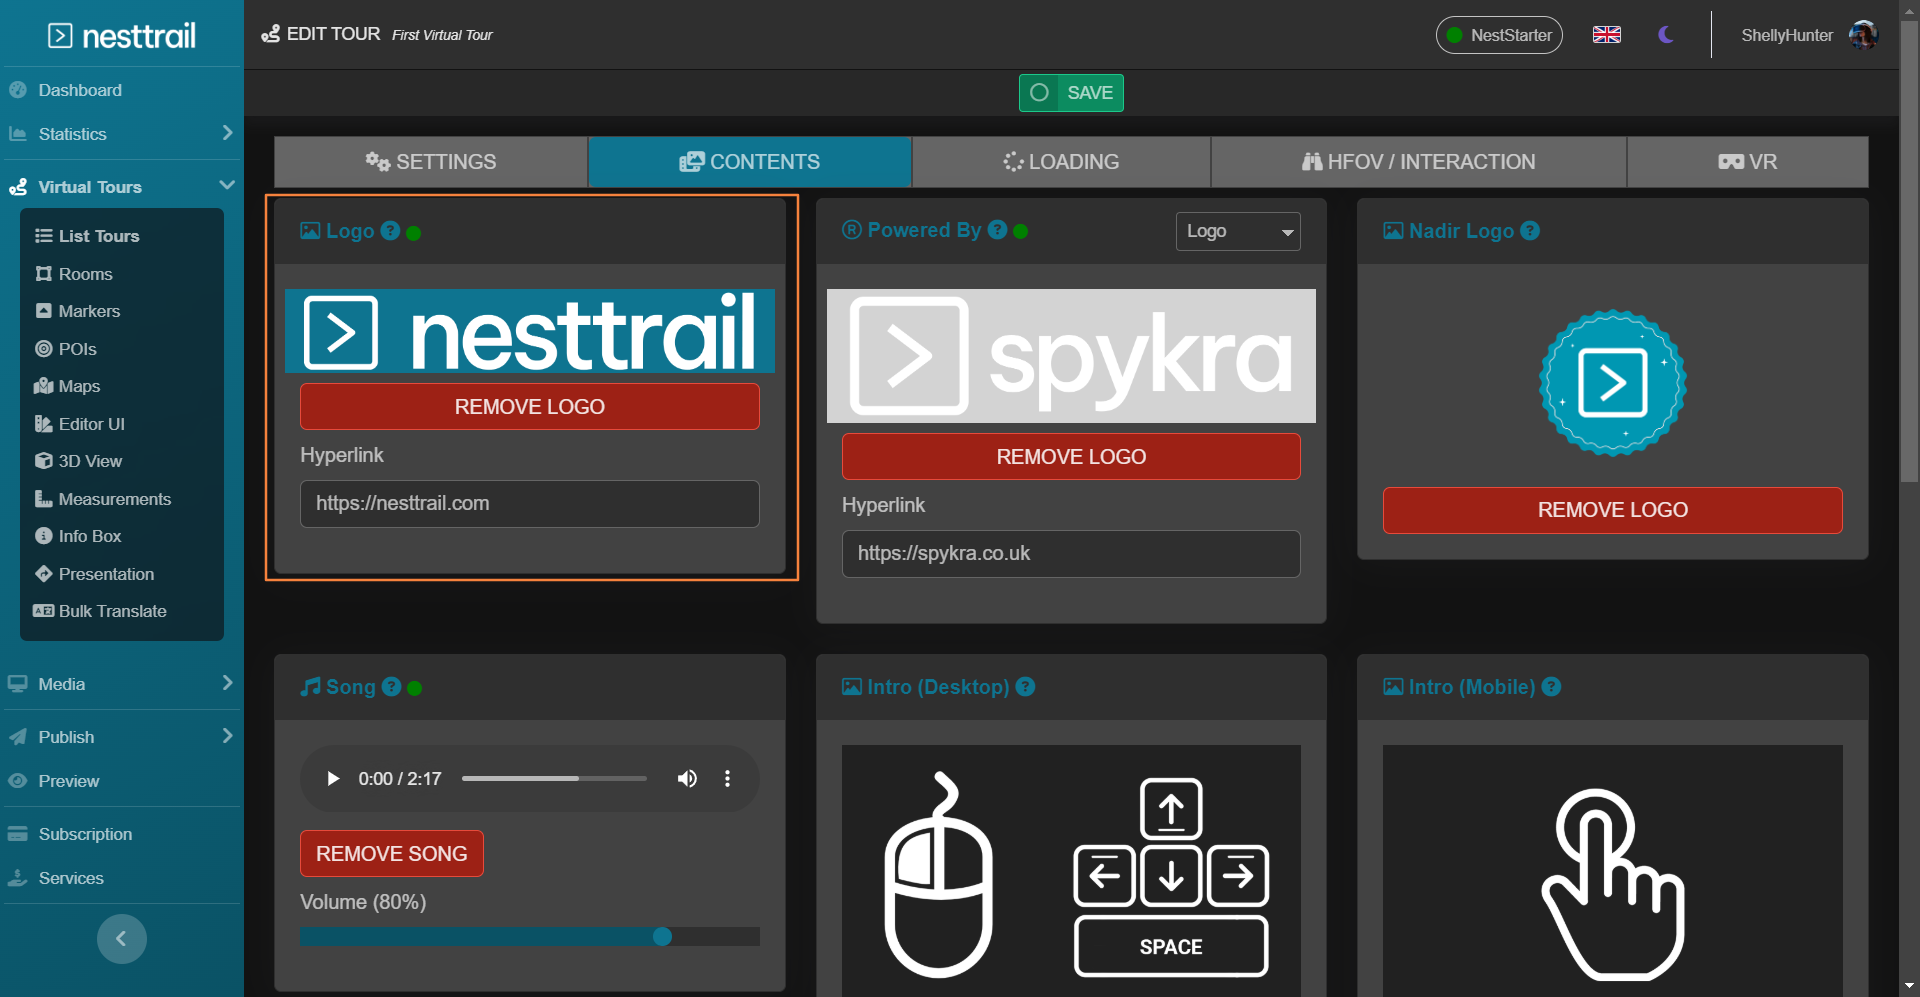
Click on the Upload button to select the image file of your logo from your device. For best results, use a high-quality image file, such as PNG or JPG, with a transparent background if possible. NestTrail also allows you to optionally add a hyperlink to the logo. This feature is ideal for redirecting users to your website or a specific landing page when they click on the logo.
Once you’ve uploaded the logo and, if desired, added a hyperlink, click the Save button at the top of the page to apply the changes. This ensures the logo is integrated into the virtual tour.
Adjusting the Logo’s Size and Position
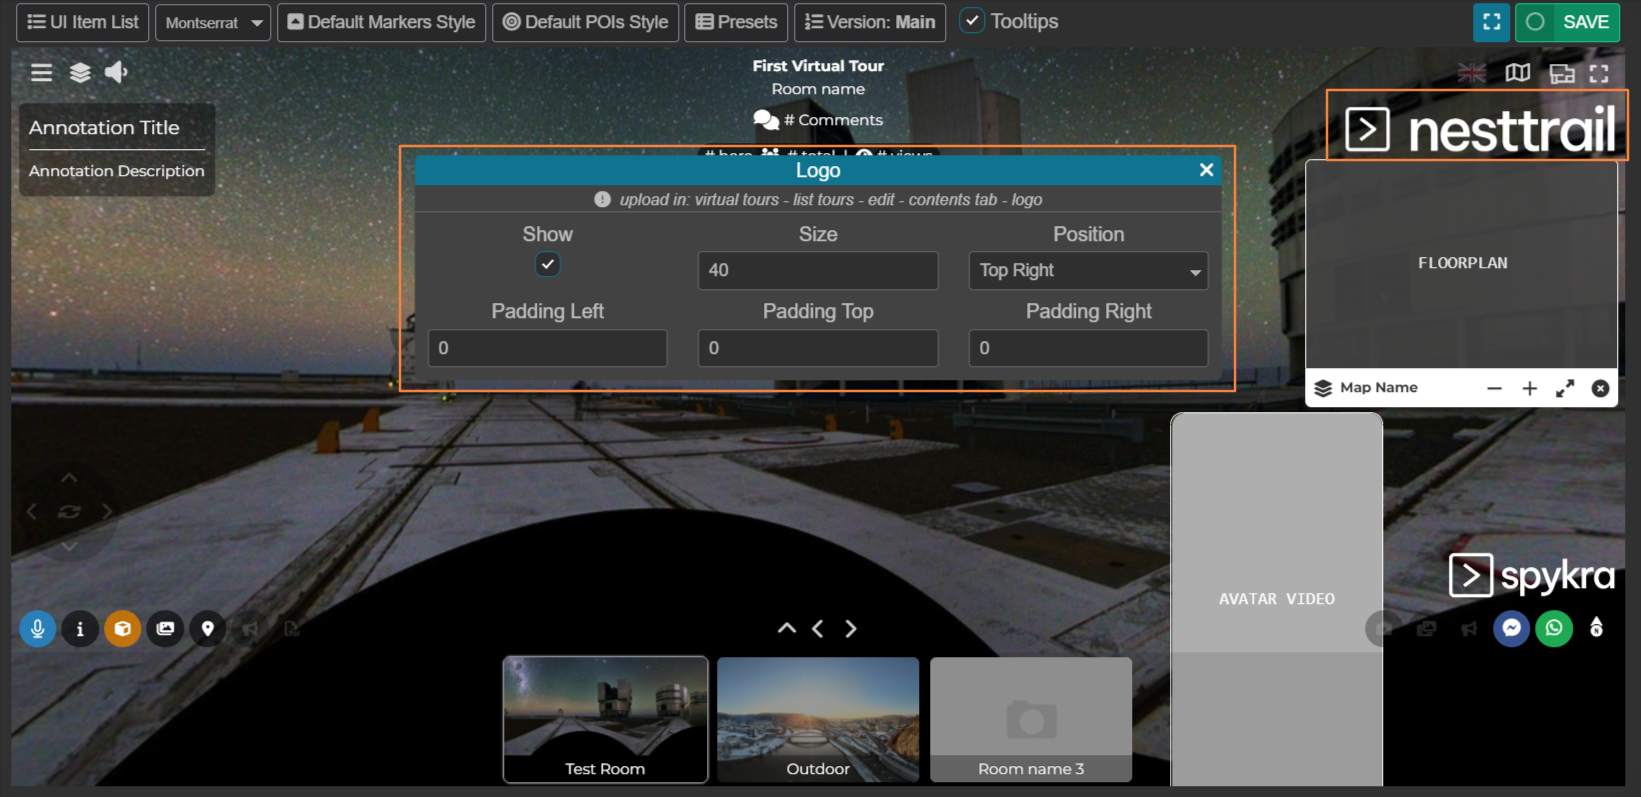
After uploading your logo, you can further customize its appearance and placement within the virtual tour. To do this, navigate to the Editor UI section from the side menu and click on the logo box. This opens the editing options for the logo.
In this interface, you can adjust the size of the logo to ensure it fits seamlessly into the tour without obstructing important visuals. You can also reposition the logo to place it in an optimal location, such as the top-left corner or bottom-right corner of the screen. Experiment with these settings to achieve the perfect balance between visibility and unobtrusiveness.
When you’ve finalized the adjustments, click the Save button located at the top-right corner of the page. This ensures that your changes are reflected in the published version of the tour.
Benefits of Adding a Logo
Brand Recognition: A prominently displayed logo reinforces your brand identity and ensures viewers associate the virtual tour with your company or organization.
Professional Presentation: Including a logo creates a polished and professional look, enhancing the credibility of your virtual tour.
Clickable Links: Adding a hyperlink to your logo provides an additional layer of interactivity, guiding users to your website or promotional content.
Tips for Effective Logo Integration
Use Transparent Backgrounds: A logo with a transparent background looks cleaner and integrates seamlessly with the virtual tour interface.
Optimize Size: Ensure the logo is not too large, which could distract users, or too small, which could make it hard to notice.
Test on Different Devices: Preview the virtual tour on both desktop and mobile devices to ensure the logo is displayed correctly across all platforms.
By incorporating your logo into your NestTrail virtual tours, you can achieve a cohesive and branded experience that leaves a lasting impression on your audience. Whether used for marketing, education, or entertainment, a well-placed logo adds professionalism and value to your virtual tours.