Ensuring the right balance between performance and quality in your virtual tour is essential to providing a smooth and visually appealing experience for users. In NestTrail, you can easily optimize the quality settings of your panorama images to achieve the best possible performance without compromising visual fidelity. This guide will walk you through the detailed process of adjusting these settings to meet your specific needs.
Accessing Panorama Image Quality Settings
To adjust the quality settings of panorama images, begin by navigating to the Virtual Tours section from the side menu and selecting List Tours. Locate the tour for which you want to optimize the panorama images and click the Edit button. Once inside the tour editor, scroll down to the Performance section. This section contains all the essential settings to fine-tune your panorama images and achieve the optimal balance between performance and image quality.

Available Quality Settings
NestTrail provides a variety of settings that allow you to customize the panorama image quality based on your requirements. Below is a detailed explanation of each setting:
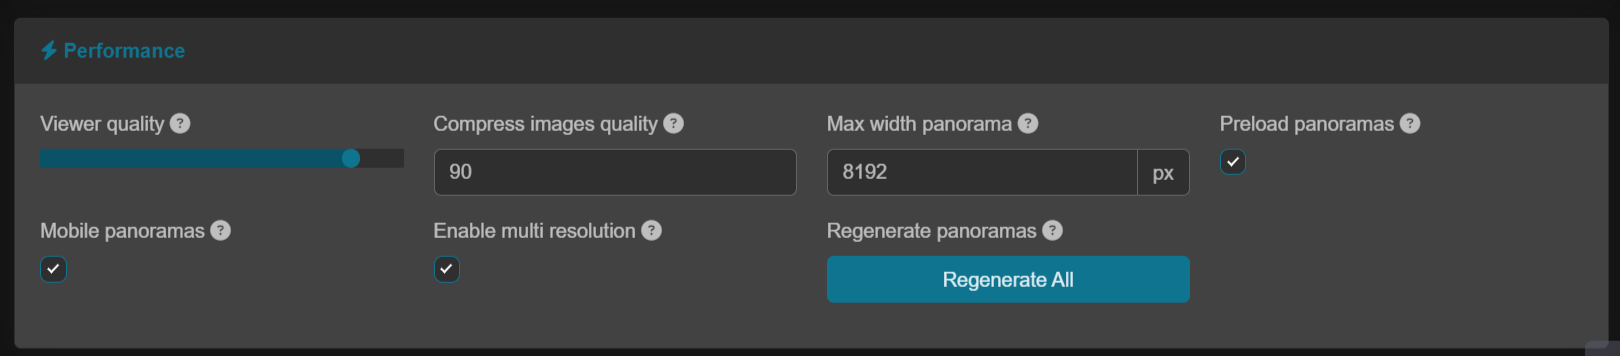
1. Viewer Quality
The Viewer Quality setting determines the overall visual fidelity of the tour as seen by the user. Increasing the viewer quality enhances the clarity and sharpness of the images, while lowering it can improve loading times and responsiveness, especially for users with slower internet connections.
2. Compress Image Quality
This setting controls the level of image compression applied to panorama images. A lower value increases compression, which reduces file size and improves loading speed but may result in a loss of image clarity. Conversely, higher values preserve more details but may increase loading times and storage requirements. It is crucial to find the right balance based on your tour's target audience and platform.
3. Max Width Panorama
The Max Width Panorama parameter sets the maximum pixel size for the uploaded images. If an image exceeds this limit, it will be automatically resized to conform to the specified dimensions. This setting is particularly useful for maintaining consistent image quality across different devices and preventing oversized images from affecting tour performance.
4. Preload Panoramas
Enabling the Preload Panoramas option allows all rooms within the tour to be preloaded in the background. This feature enhances user experience by ensuring smooth transitions between rooms without delays. However, it may increase the initial loading time, especially for tours with numerous high-resolution images.
5. Mobile Panoramas
The Mobile Panoramas setting creates optimized versions of panorama images for mobile devices. This ensures that users accessing the tour on smartphones or tablets experience faster loading times and smoother navigation without sacrificing too much visual quality.
6. Enable Multi-Resolution
When enabled, the Multi-Resolution setting divides images into different resolution levels that are loaded asynchronously based on the user's zoom level. This dynamic loading approach improves performance by serving lower resolution images when the user is zoomed out and higher resolution images when zoomed in, offering a seamless viewing experience.
Clean Up Section
In the Clean Up section, you can decide whether to retain the original loaded versions of your panorama images. If you choose to disable this option, the system will delete the original files after applying the new quality settings. Keep in mind that disabling this feature means you won’t be able to revert or adjust quality settings later without re-uploading the images.
Applying Your Changes
Once you have adjusted the quality settings according to your preferences, click the Regenerate All button to apply the changes to your panorama images. This process ensures that all images are updated with the new settings and optimized accordingly. Finally, click Save at the top of the page to confirm and store your changes.
Best Practices for Optimizing Panorama Quality
To achieve the best results when configuring panorama quality settings, consider the following best practices:
Balance Quality and Performance: Aim for an optimal mix of quality and loading speed, especially for users with varying internet speeds.
Test Across Devices: Always preview your tour on different devices (desktop, tablet, mobile) to ensure consistent visual quality.
Optimize Image Dimensions: Upload images that match the recommended resolution to minimize the need for resizing and compression.
Enable Multi-Resolution: This feature is particularly beneficial for large tours with high-resolution images, as it ensures smoother performance during navigation.
By following these steps and guidelines, you can effectively fine-tune the panorama image quality in NestTrail, providing an immersive and visually stunning virtual tour experience for your audience.