Adding a room, or panorama, into your virtual tour is an essential step in creating an immersive and engaging experience for your audience in the NestTrail application. This guide will walk you through the process of adding rooms, detailing the various types of rooms you can create and the features available to help you build your virtual tour effectively.
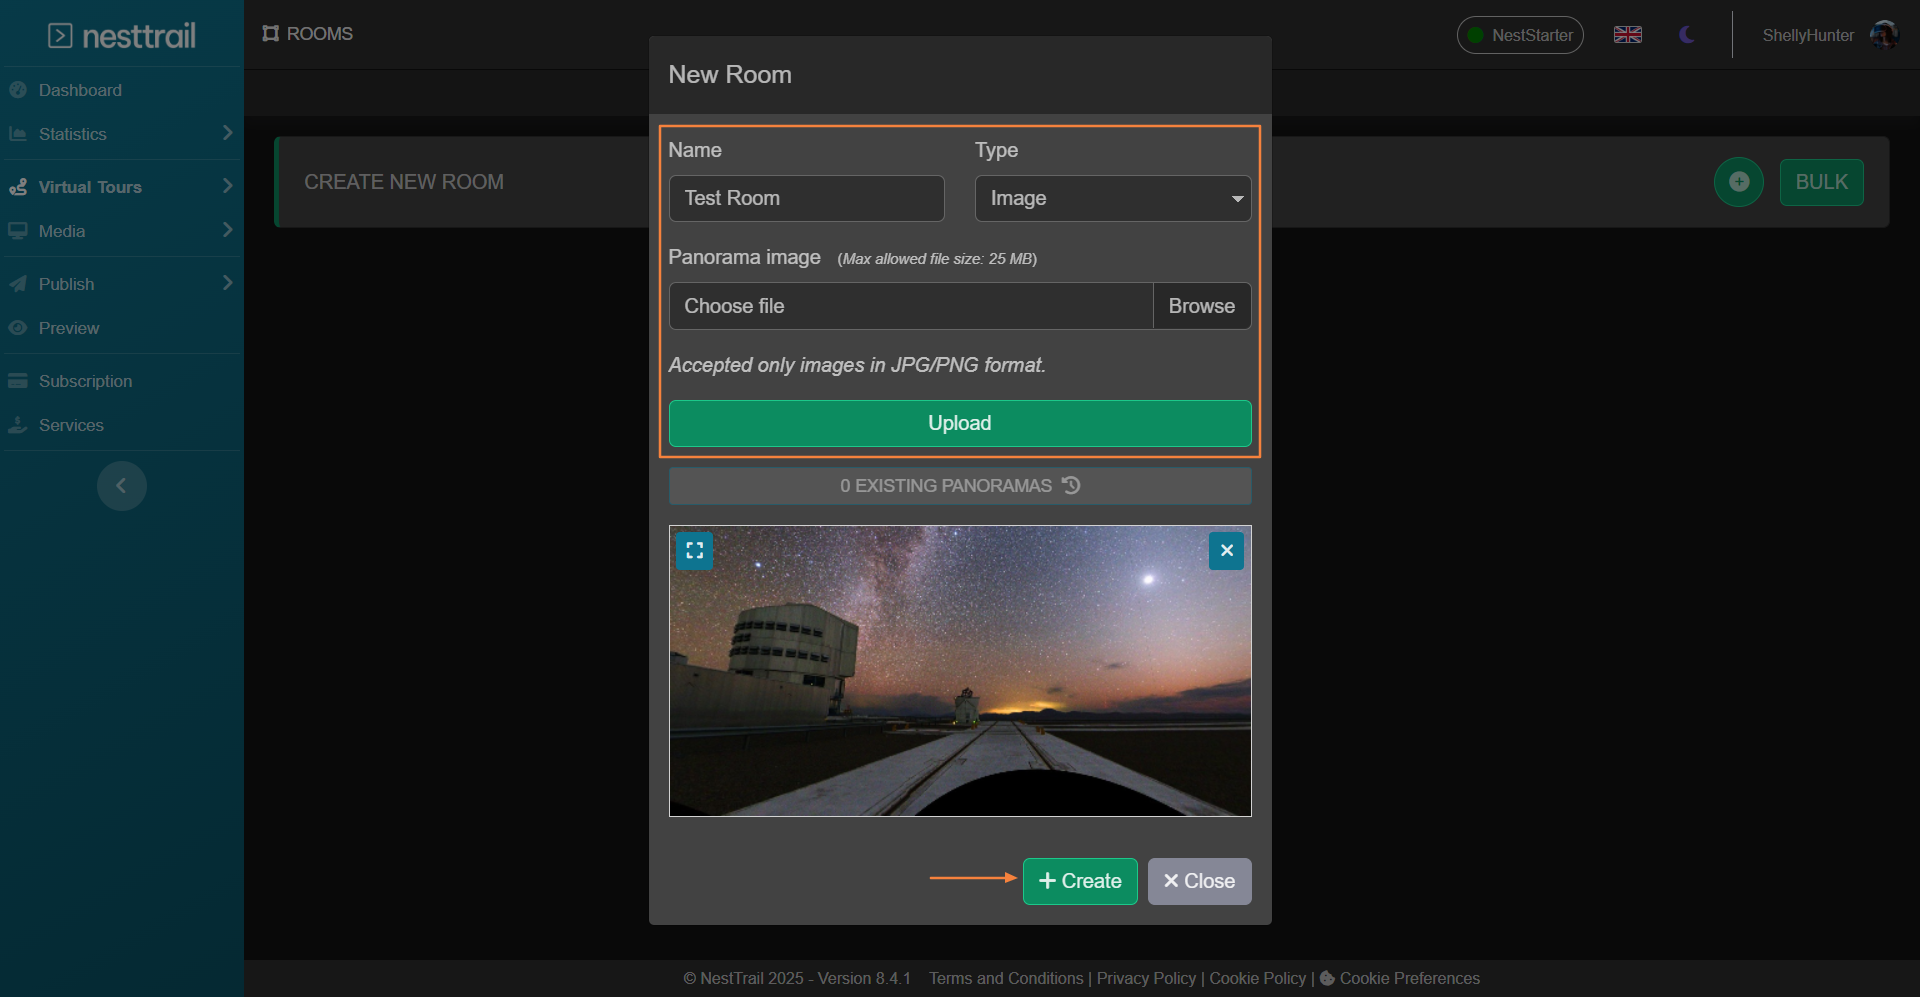
To get started, navigate to the Virtual Tours section from the side menu and select Rooms. This section allows you to manage and add rooms to your tour. On the top right corner of the screen, click on the "+" icon to create a new room. Once clicked, a pop-up window will appear, prompting you to fill out the required information to set up the new room.

In the pop-up window, begin by entering a name for your room in the Name field. The name should represent the space you are creating, such as "Kitchen" or "Living Room." This helps in organizing and identifying rooms in your virtual tour. Next, choose the type of room you want to create. NestTrail offers five different room types, each catering to specific content requirements:
Image: Upload a static image of a panorama in either JPG or PNG format. For optimal results, especially for 360-degree panoramas, use an image with a 2:1 resolution ratio.
A.I. Panorama: With this innovative feature, you can describe the kind of room you want, and the AI tool will generate it for you, saving time and effort.
Video 360: Add a 360-degree video in MP4 or WebM format. Ensure the video maintains a 2:1 resolution ratio for the best experience.
Video Stream (HLS): Link to a live stream video using an HLS URL. This option is ideal for dynamic and real-time content.
Lottie: Upload a Lottie animation file in JSON format to create animated visual elements within your virtual tour.
For the purpose of this guide, let’s proceed with the default room type, which is the image option. After selecting Image, click on the Browse button to locate and select the panorama image file from your computer. Once you’ve selected the image, click Upload to initiate the process. After the upload is complete, a preview of the room will be displayed, allowing you to verify that the correct image has been uploaded. If everything looks good, click on the + Create button to finalize the creation of the room.
After creating the room, you will be redirected to its settings page. This page provides various options to adjust the room’s display parameters. You can fine-tune these settings to ensure the room integrates seamlessly into your virtual tour and provides the desired visual experience.
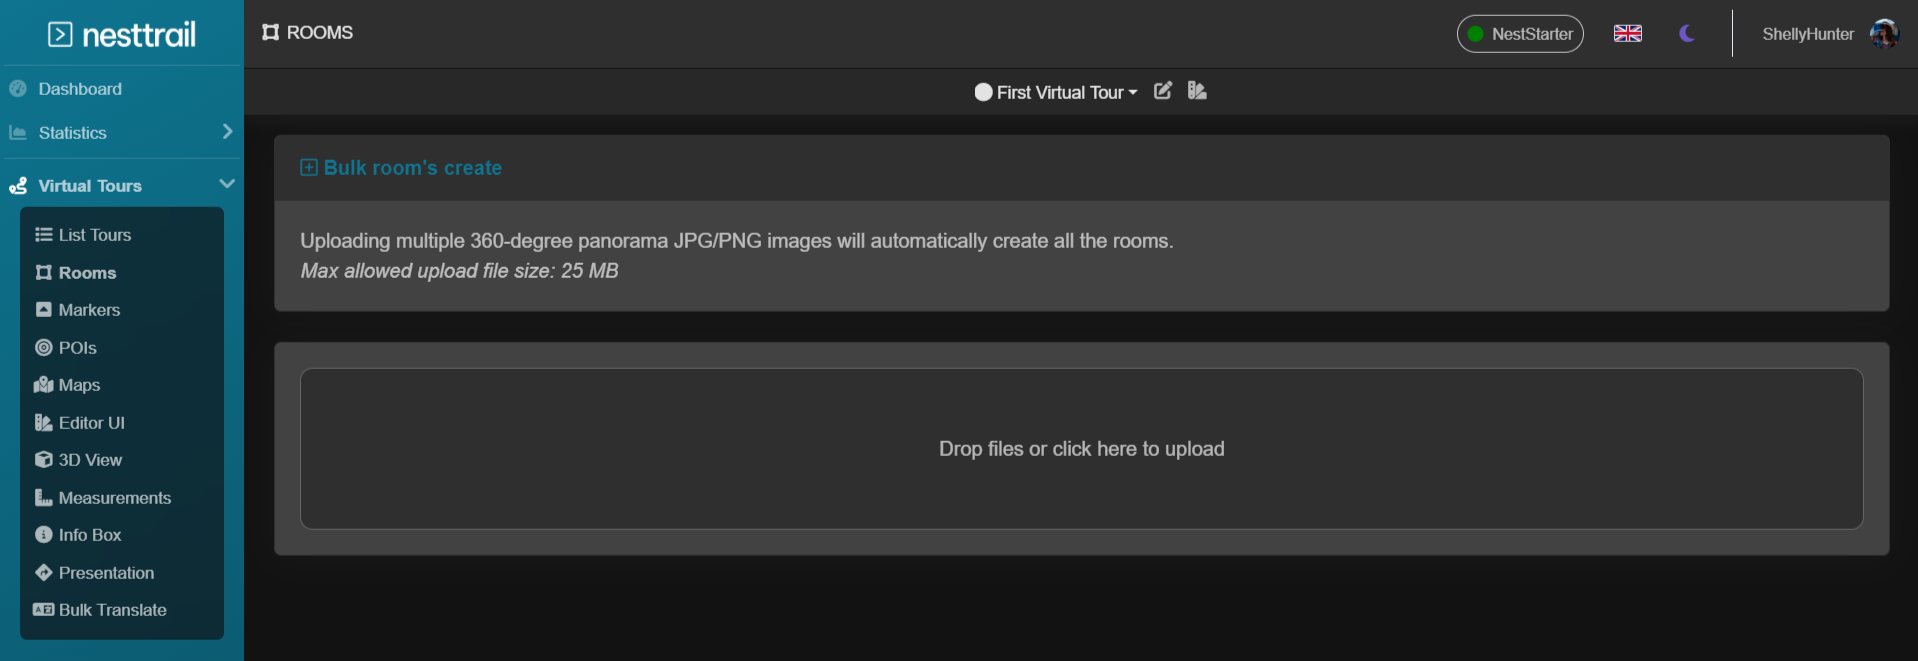
To further streamline the process, NestTrail also offers a Bulk Room Creation feature. This feature allows you to upload multiple panorama images at once by dragging and dropping JPG or PNG files directly from your computer into the designated area. The system will automatically generate rooms for each file, using the file names as room names. This option is perfect for users who need to create multiple rooms quickly and efficiently.
It’s important to note that adding rooms alone does not make a fully functional virtual tour. To create a seamless experience, you need to establish connections between rooms. These connections allow viewers to navigate through the tour effortlessly, moving from one room to another as if they were physically present.
By following these steps, you can effectively add rooms to your virtual tour in NestTrail, leveraging advanced features like AI-generated panoramas and bulk creation to enhance efficiency. Once your rooms are set up and connected, your virtual tour will be well on its way to offering an engaging and interactive experience for your audience.