Customizing the User Interface (UI) of your virtual tour in NestTrail allows you to create a visually appealing and user-friendly experience for your audience. NestTrail provides an intuitive interface for editing and configuring various UI elements, ensuring that your tour aligns with your brand and user expectations. This guide covers the detailed process of editing the UI, adjusting visual elements, and saving your changes.
Accessing the UI Editor
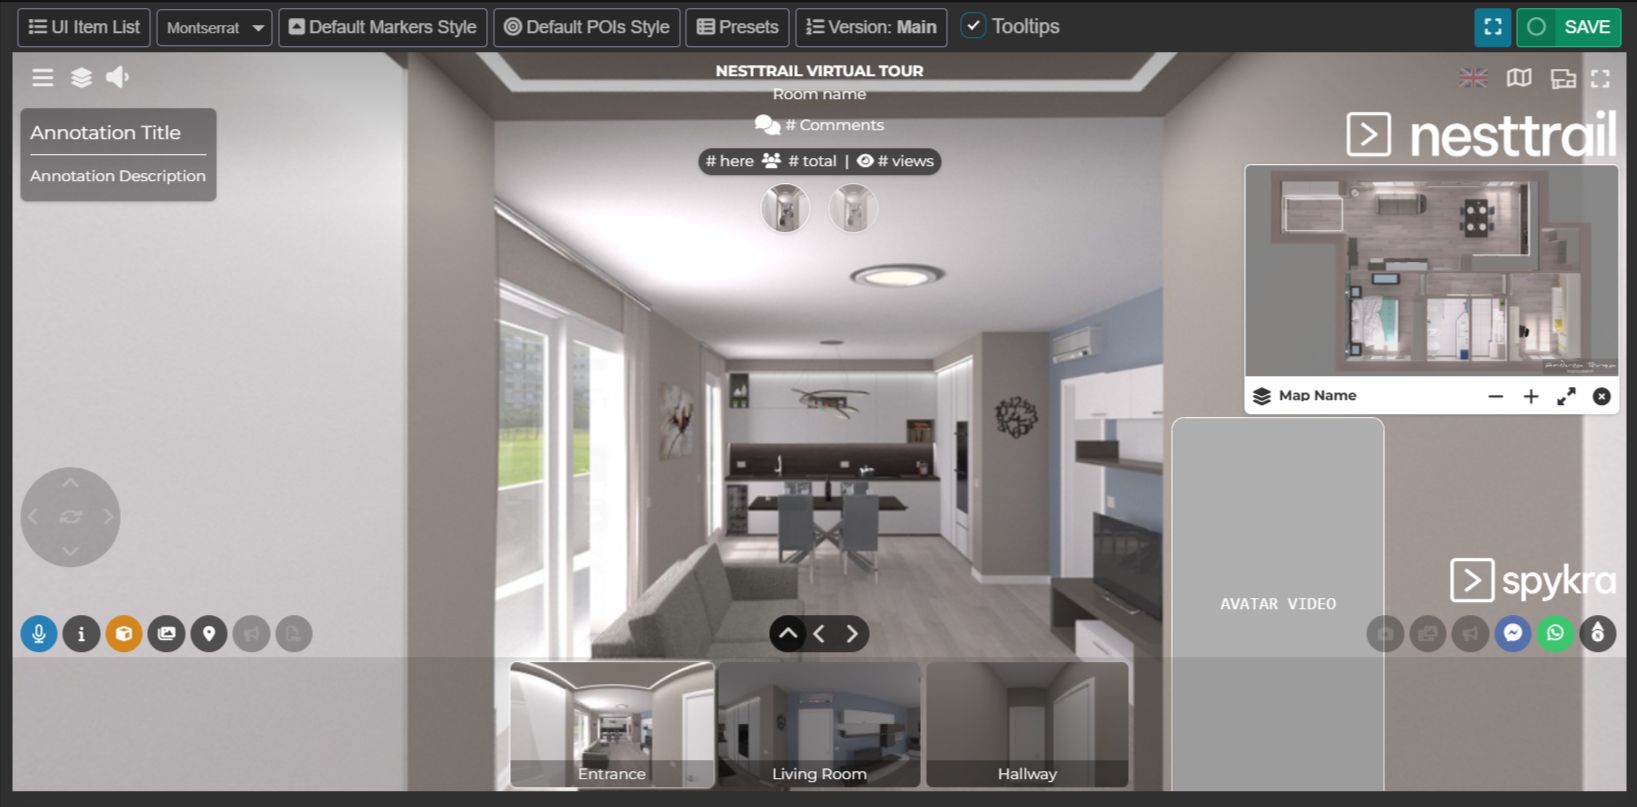
To begin editing the UI, navigate to Virtual Tours -> Editor UI from the side menu. This section provides an overview of all the UI elements currently visible in your virtual tour. Each element can be customized to enhance the overall look and feel of the tour.
Editing UI Elements
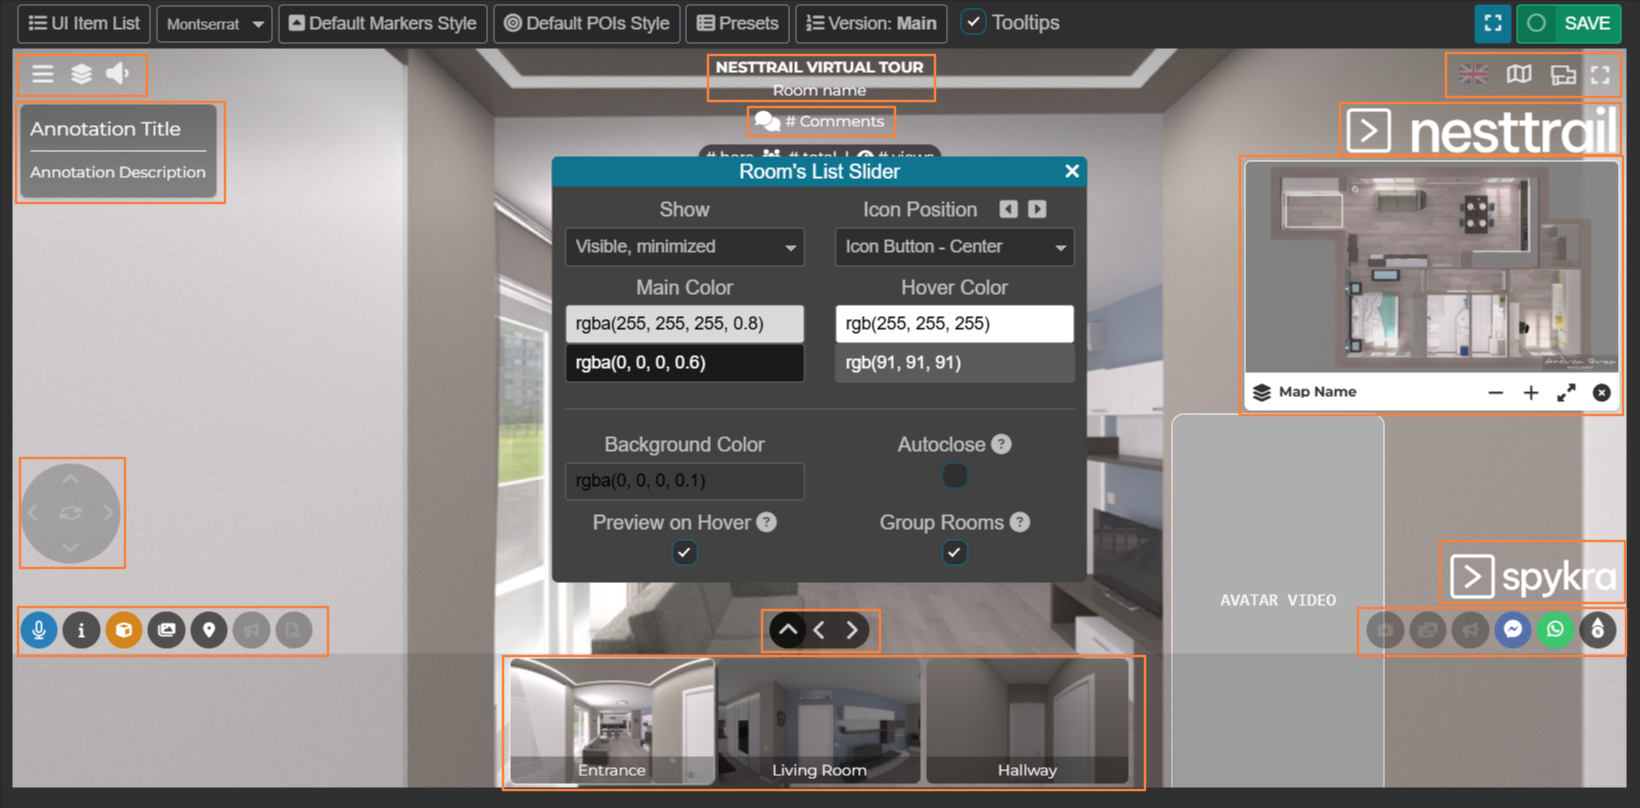
Once inside the Editor UI, you can click on any UI element to modify its properties. Each element can be enabled or disabled based on your preferences, and its appearance can be adjusted to better match your tour's style. Some of the commonly editable UI elements include:
Navigation Buttons: Customize the appearance and positioning of the navigation controls to ensure smooth movement throughout the tour.
Information Icons: Adjust size, color, and placement to provide easy access to additional content without cluttering the interface.
Menu Layout: Change the visibility and styling of menus to improve the user experience.
Fullscreen Mode Toggle: Customize the fullscreen button to make it more prominent or blend it into the UI seamlessly.
Modifying Environmental Elements
At the top of the edit menu, you will find options to modify various environmental UI settings that apply to the entire tour. These settings allow for global changes that impact the overall look and usability of the tour. Key environmental elements include:
Font Settings: Customize the general font used across the entire tour to align with your brand identity. Choose from a variety of fonts to ensure readability and consistency.
Main Form Configuration: Define the parameters of the general form, including input fields, button styles, and form layouts to capture user data effectively.
Default Markers Style: Set style parameters such as color, shape, and size for all newly added markers. This ensures a consistent appearance across the tour.
Default POIs Style: Configure the default style for Points of Interest (POIs), including icons, animations, and interaction settings.
Presets: Save and load UI presets to quickly apply preferred design settings across multiple tours. This feature is particularly useful for maintaining a consistent look across different projects.
Tooltips: Choose whether to display tooltips when users hover over specific UI elements. Tooltips can provide helpful information without overwhelming the interface.
Saving Your Changes
After making the necessary adjustments to the UI, click the Save button located in the top-right corner of the page. This ensures that all your changes are applied and visible in the live virtual tour. It is recommended to preview your tour after saving to verify that all elements are displayed correctly and function as intended.

Best Practices for UI Customization
To create an engaging and effective virtual tour experience, consider the following best practices when editing the UI:
Maintain Simplicity: Avoid overcrowding the interface with too many elements. Focus on essential features to create a clean and intuitive experience.
Consistency is Key: Use uniform colors, fonts, and styles throughout the tour to maintain brand identity and professional appeal.
User-Centered Design: Ensure that interactive elements are easily accessible and logically placed to improve user navigation.
Test Across Devices: Preview the tour on different devices to confirm that the UI is responsive and functions well on desktops, tablets, and smartphones.
By leveraging the customization options available in NestTrail, you can create a visually stunning and highly functional virtual tour that caters to your audience's needs. Take the time to experiment with different settings and layouts to achieve the best possible experience.